Entry tags:
Pattern for Old America "plain" square with pictures
Here is the pattern for my "plain" square for my temperature blanket. The text is the same as what was in my main post about the blanket, but this one will have step by step pictures for anyone who likes it see the pattern as well as or instead of reading it.
The square was for Friday June 4, it was 30 degrees Celsius with no rain, so the square is Claret and the border is Walnut Tweed, both "Impeccable Loops & Threads" yarn.
List of relevant abbreviations
***English terms, American terms will be in brackets
Wrh = wool round hook (I always say this as wrap round hook in my head)
Ch = chain
Sl st = slip stitch
Sc = single crochet (Amer. = slip stitch)
Dc = double crochet (Amer. = single crochet)
Tr = treble crochet (Amer. = double crochet)
Dble tr = double treble crochet (Amer. = treble crochet)
Sp = space
**I'm going to copy the patterns from the book as is, so all abbrevations will be referring to the English terms. For consistency's sake, any time I need to talk about a stitch or add instructions, I will also be using the English terms, even though I'm used to my grandma using the American ones. If anything is unclear, let me know, and I'll do my best to clarify.
Patterns from Mon Tricot Knitting Dictionay 900 Stitches Patterns (I'm not certain of the year)
Old America
Pattern for the "plain" square:
*In the book, this pattern switches colours, but I'm using only one colour per square so I will leave put the colour switching instructions. I am also going to six rounds instead of four, so I will write in the last two rounds myself.
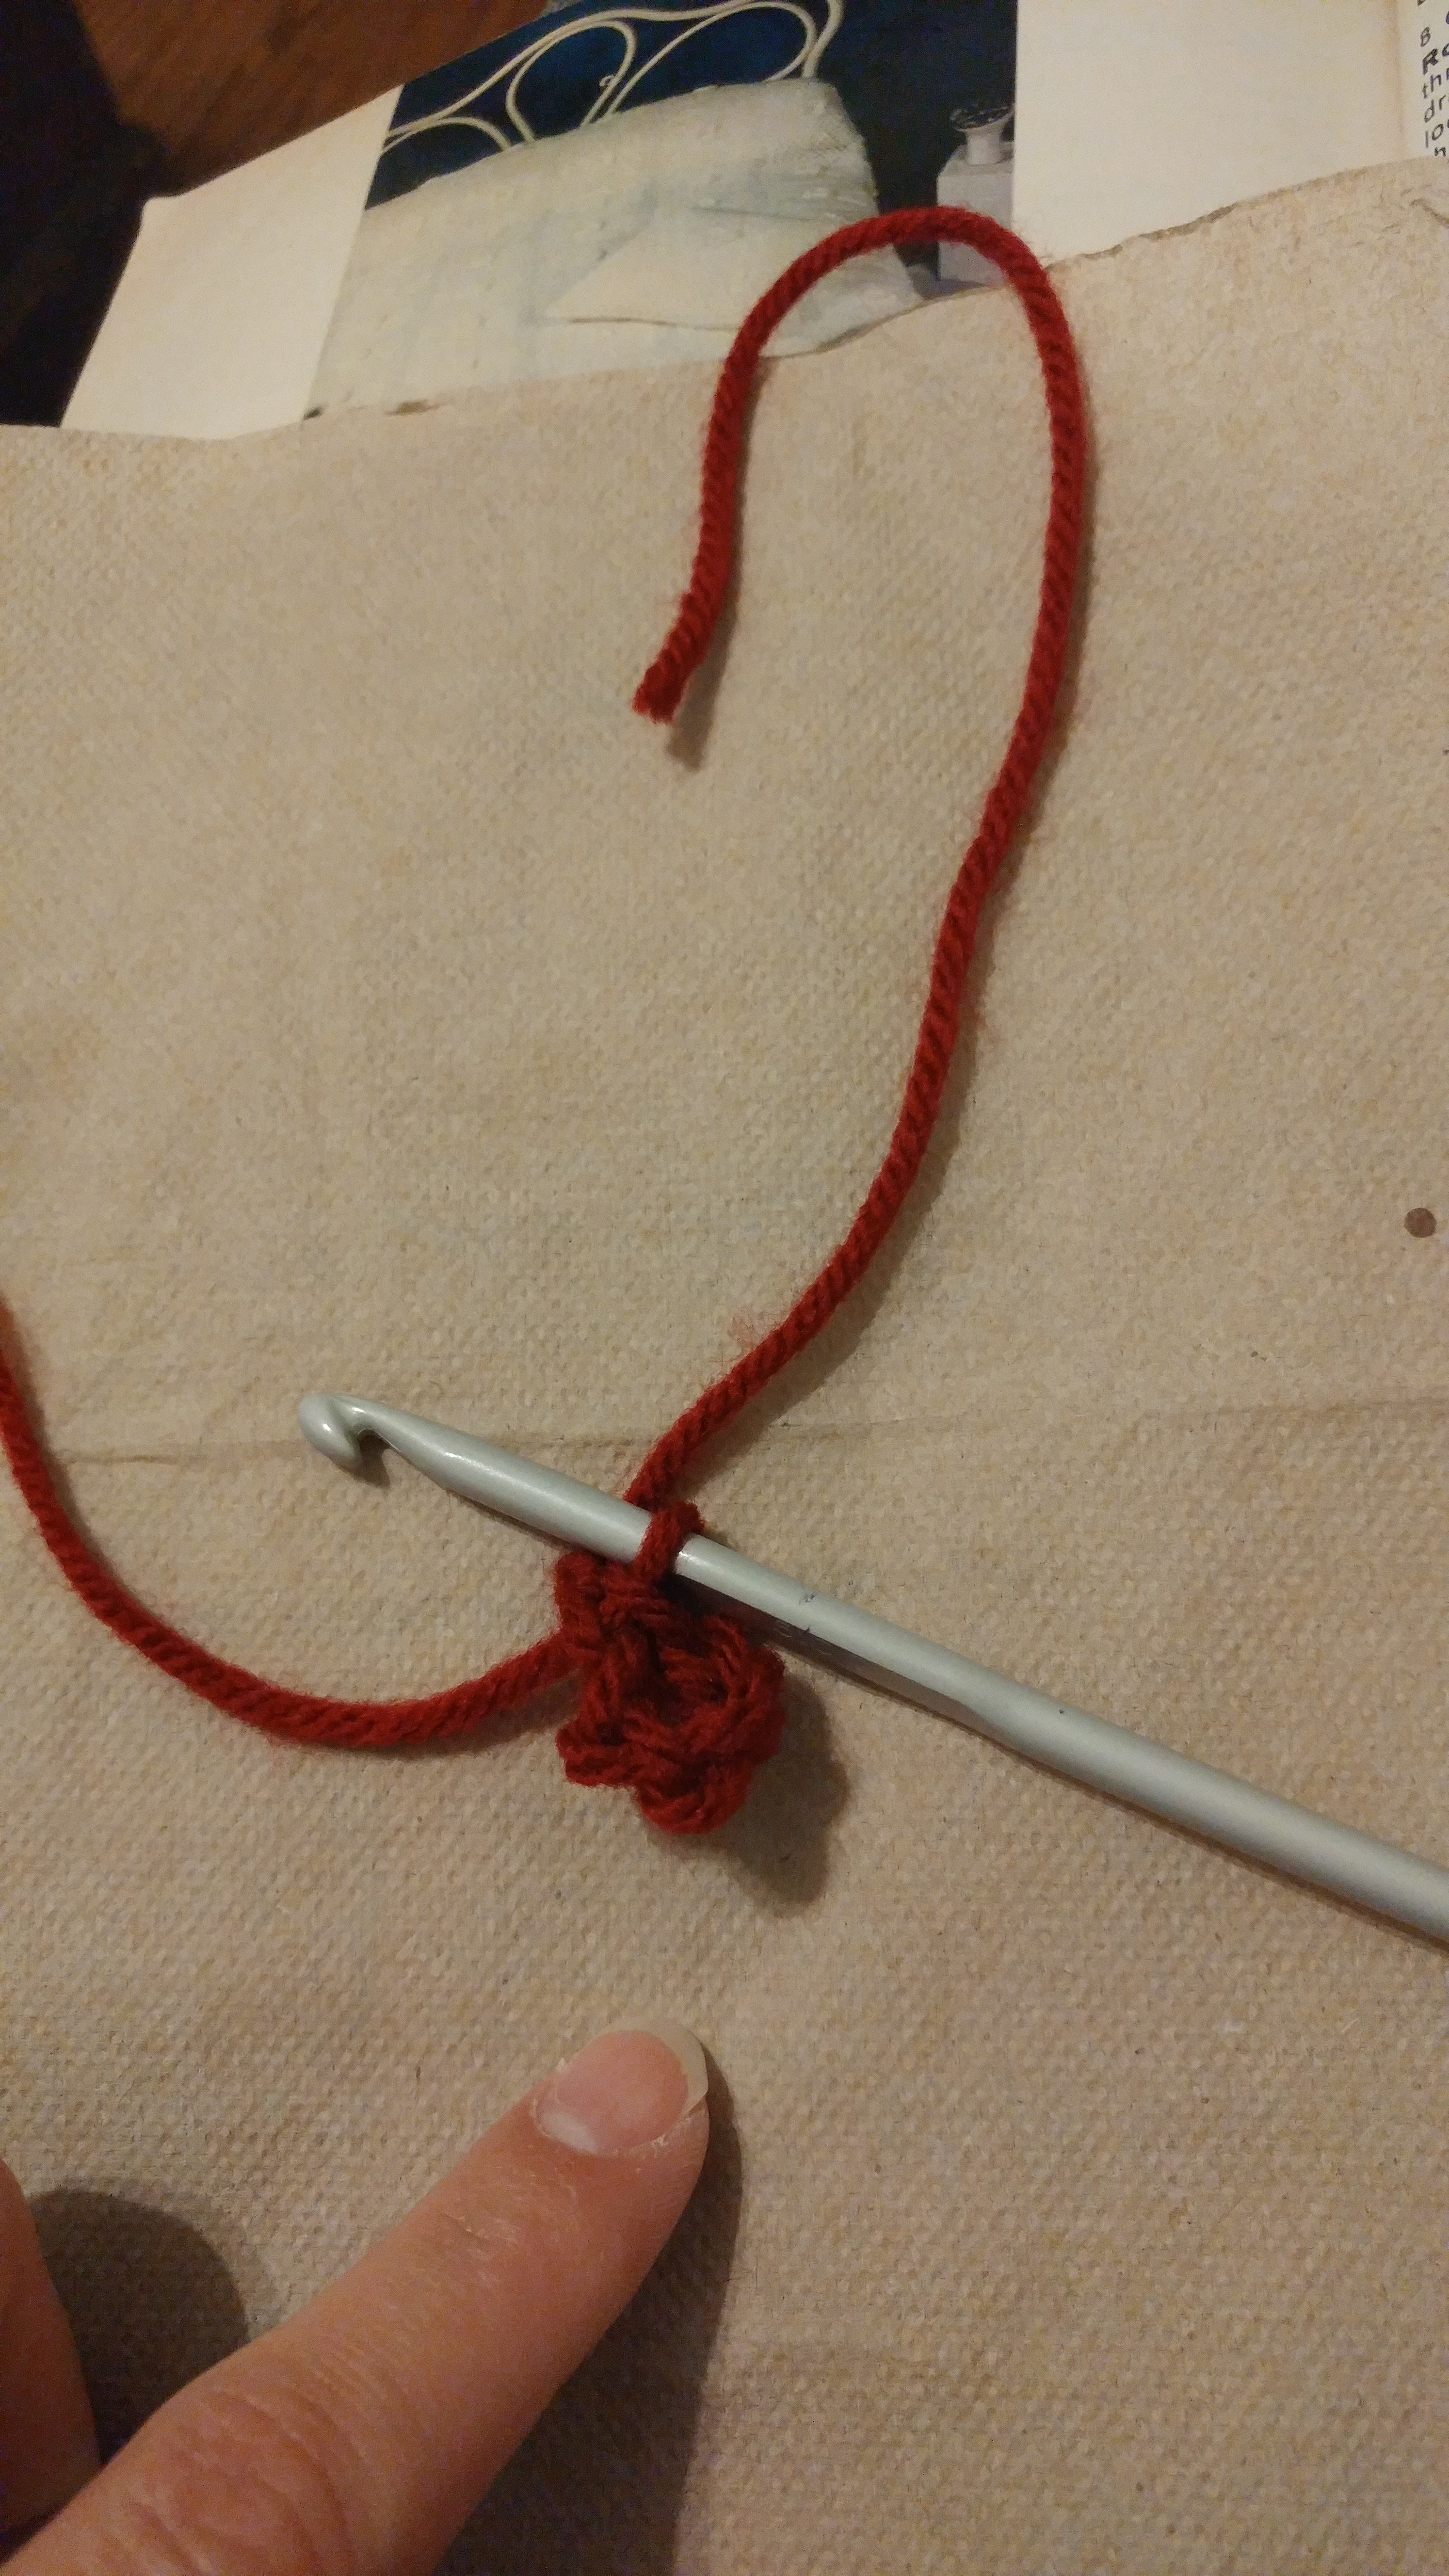
6 Ch, join into a ring with a sl st.
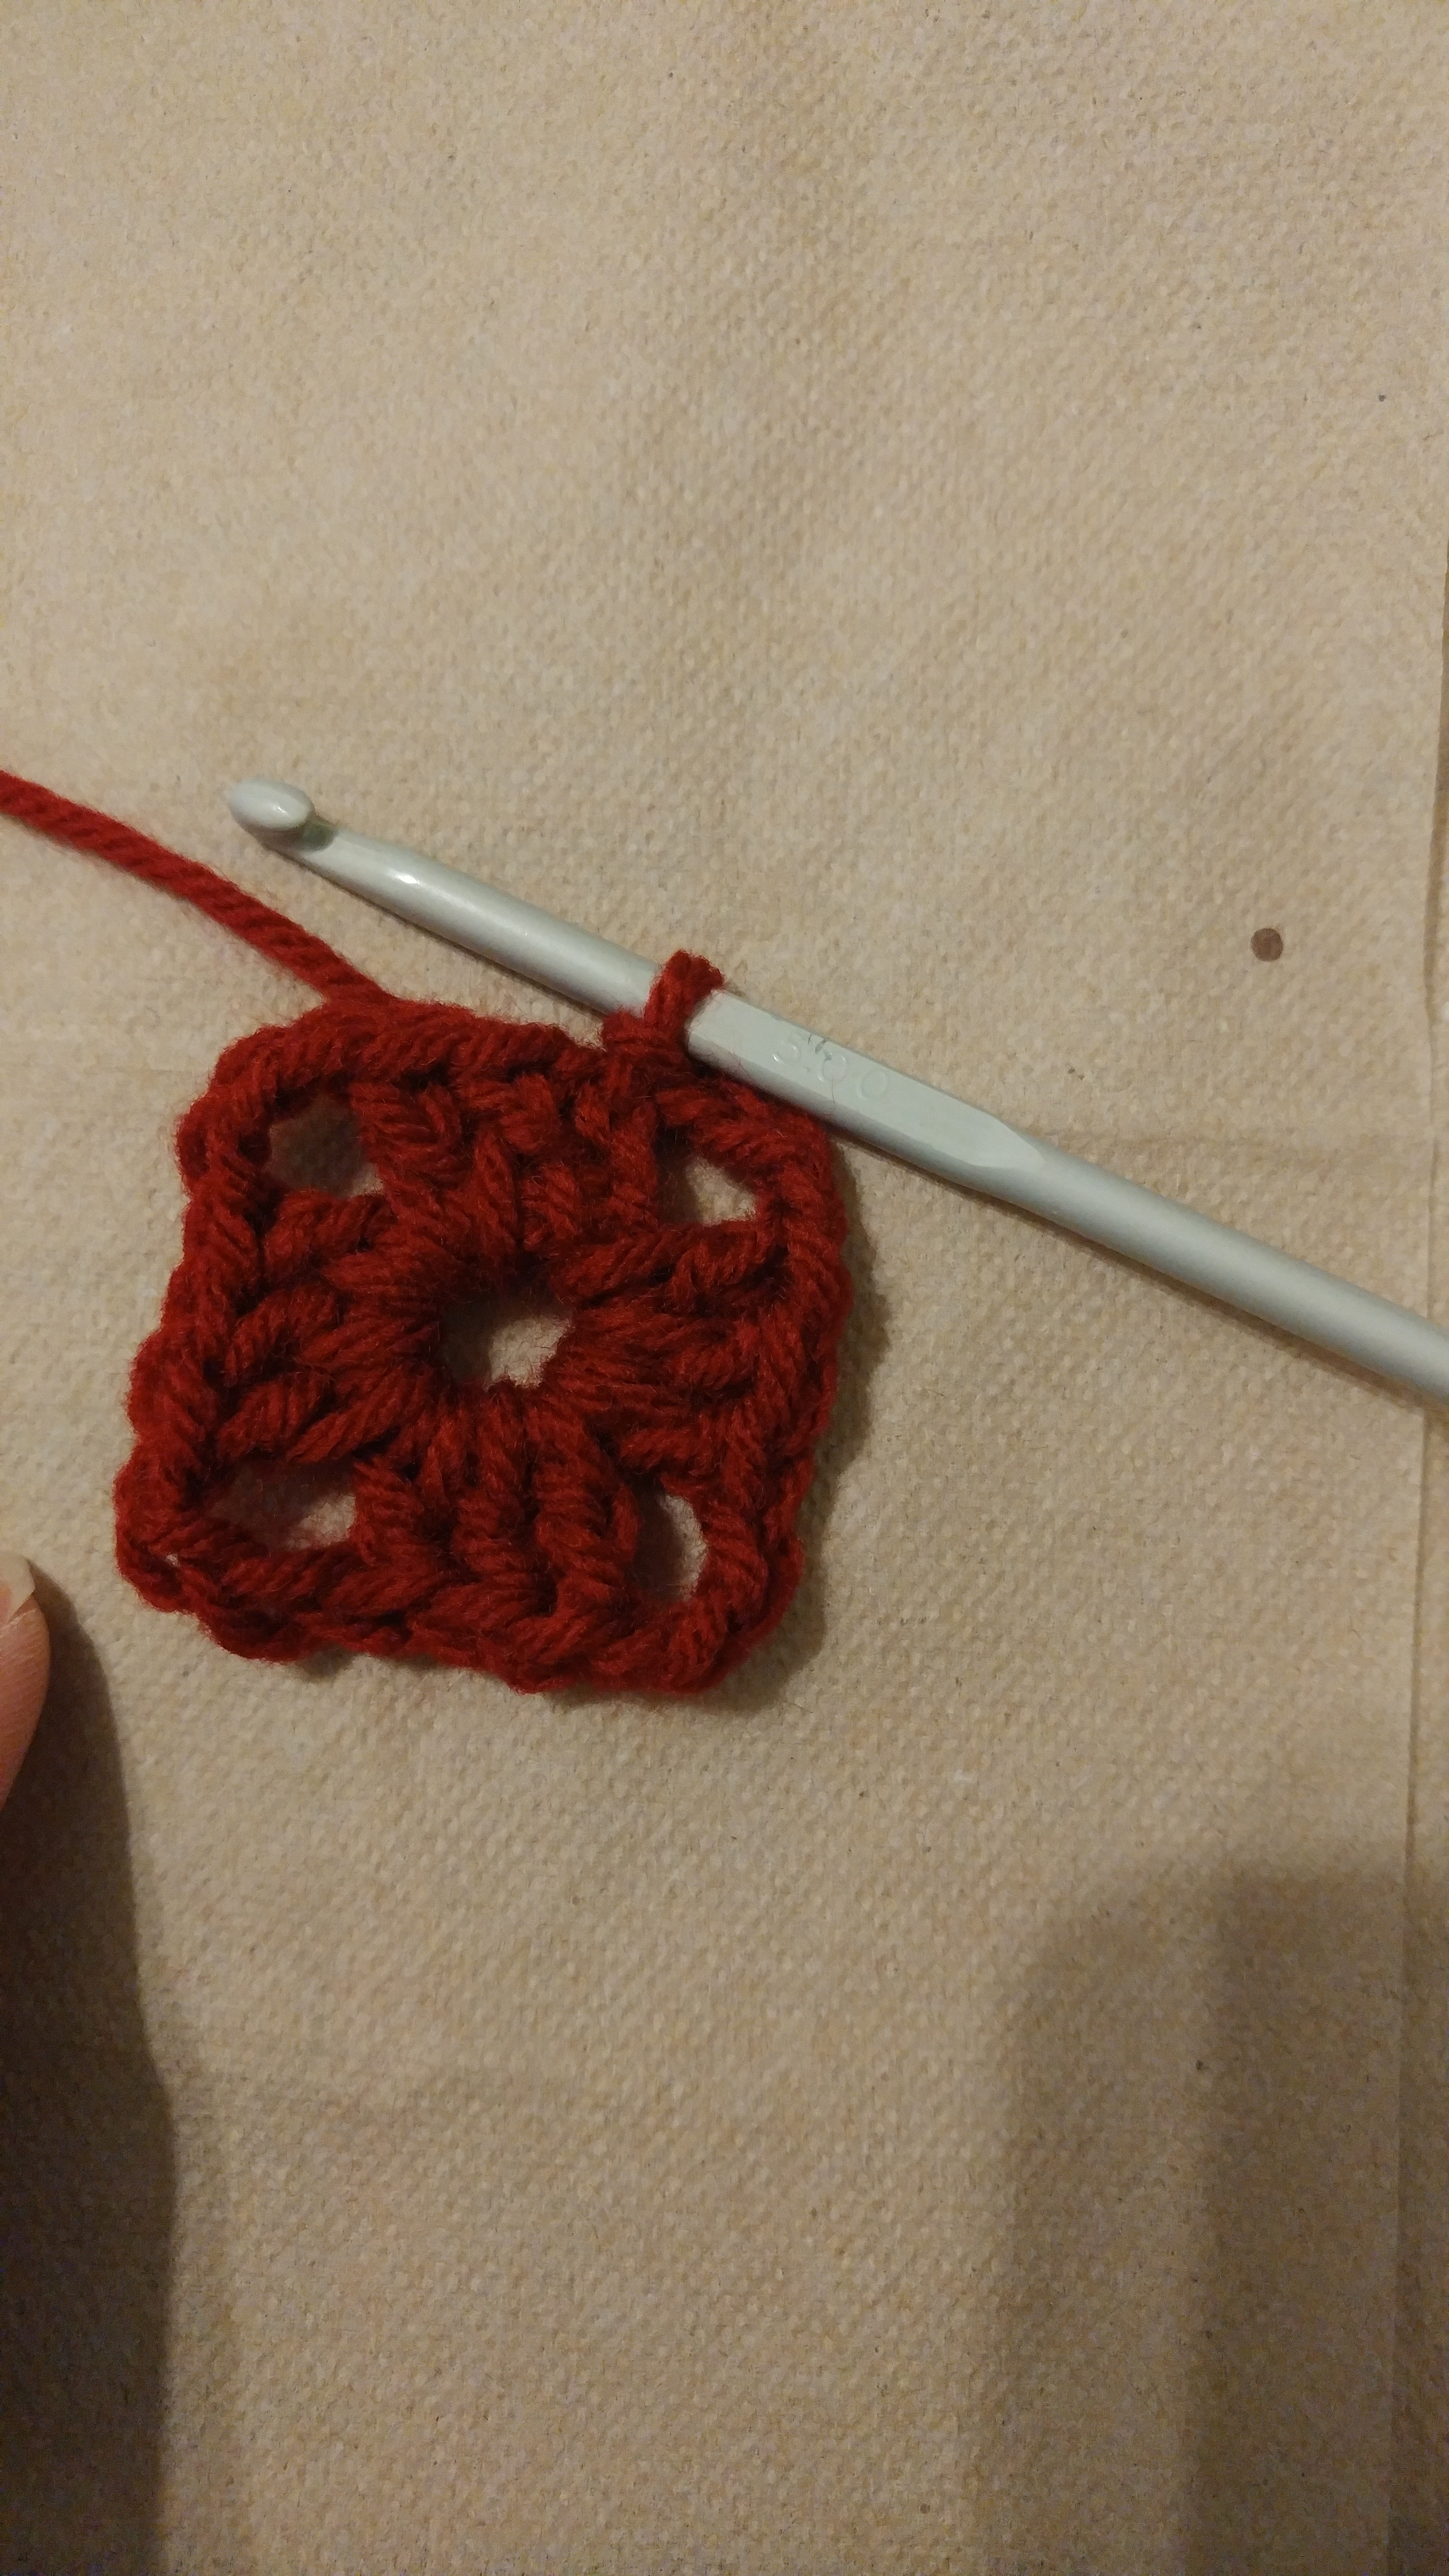
Row 1: 2 ch, 2 tr 3ch, *3 tr, 3 ch into ring, rep from * twice, sl st to first 2 ch.^
^My grandma always says to turn the work between each round so that the square is "double-sided," so after joining with a slip stitch, I turn the work and do another slip stitch in the same spot to put the yarn back in the right spot.
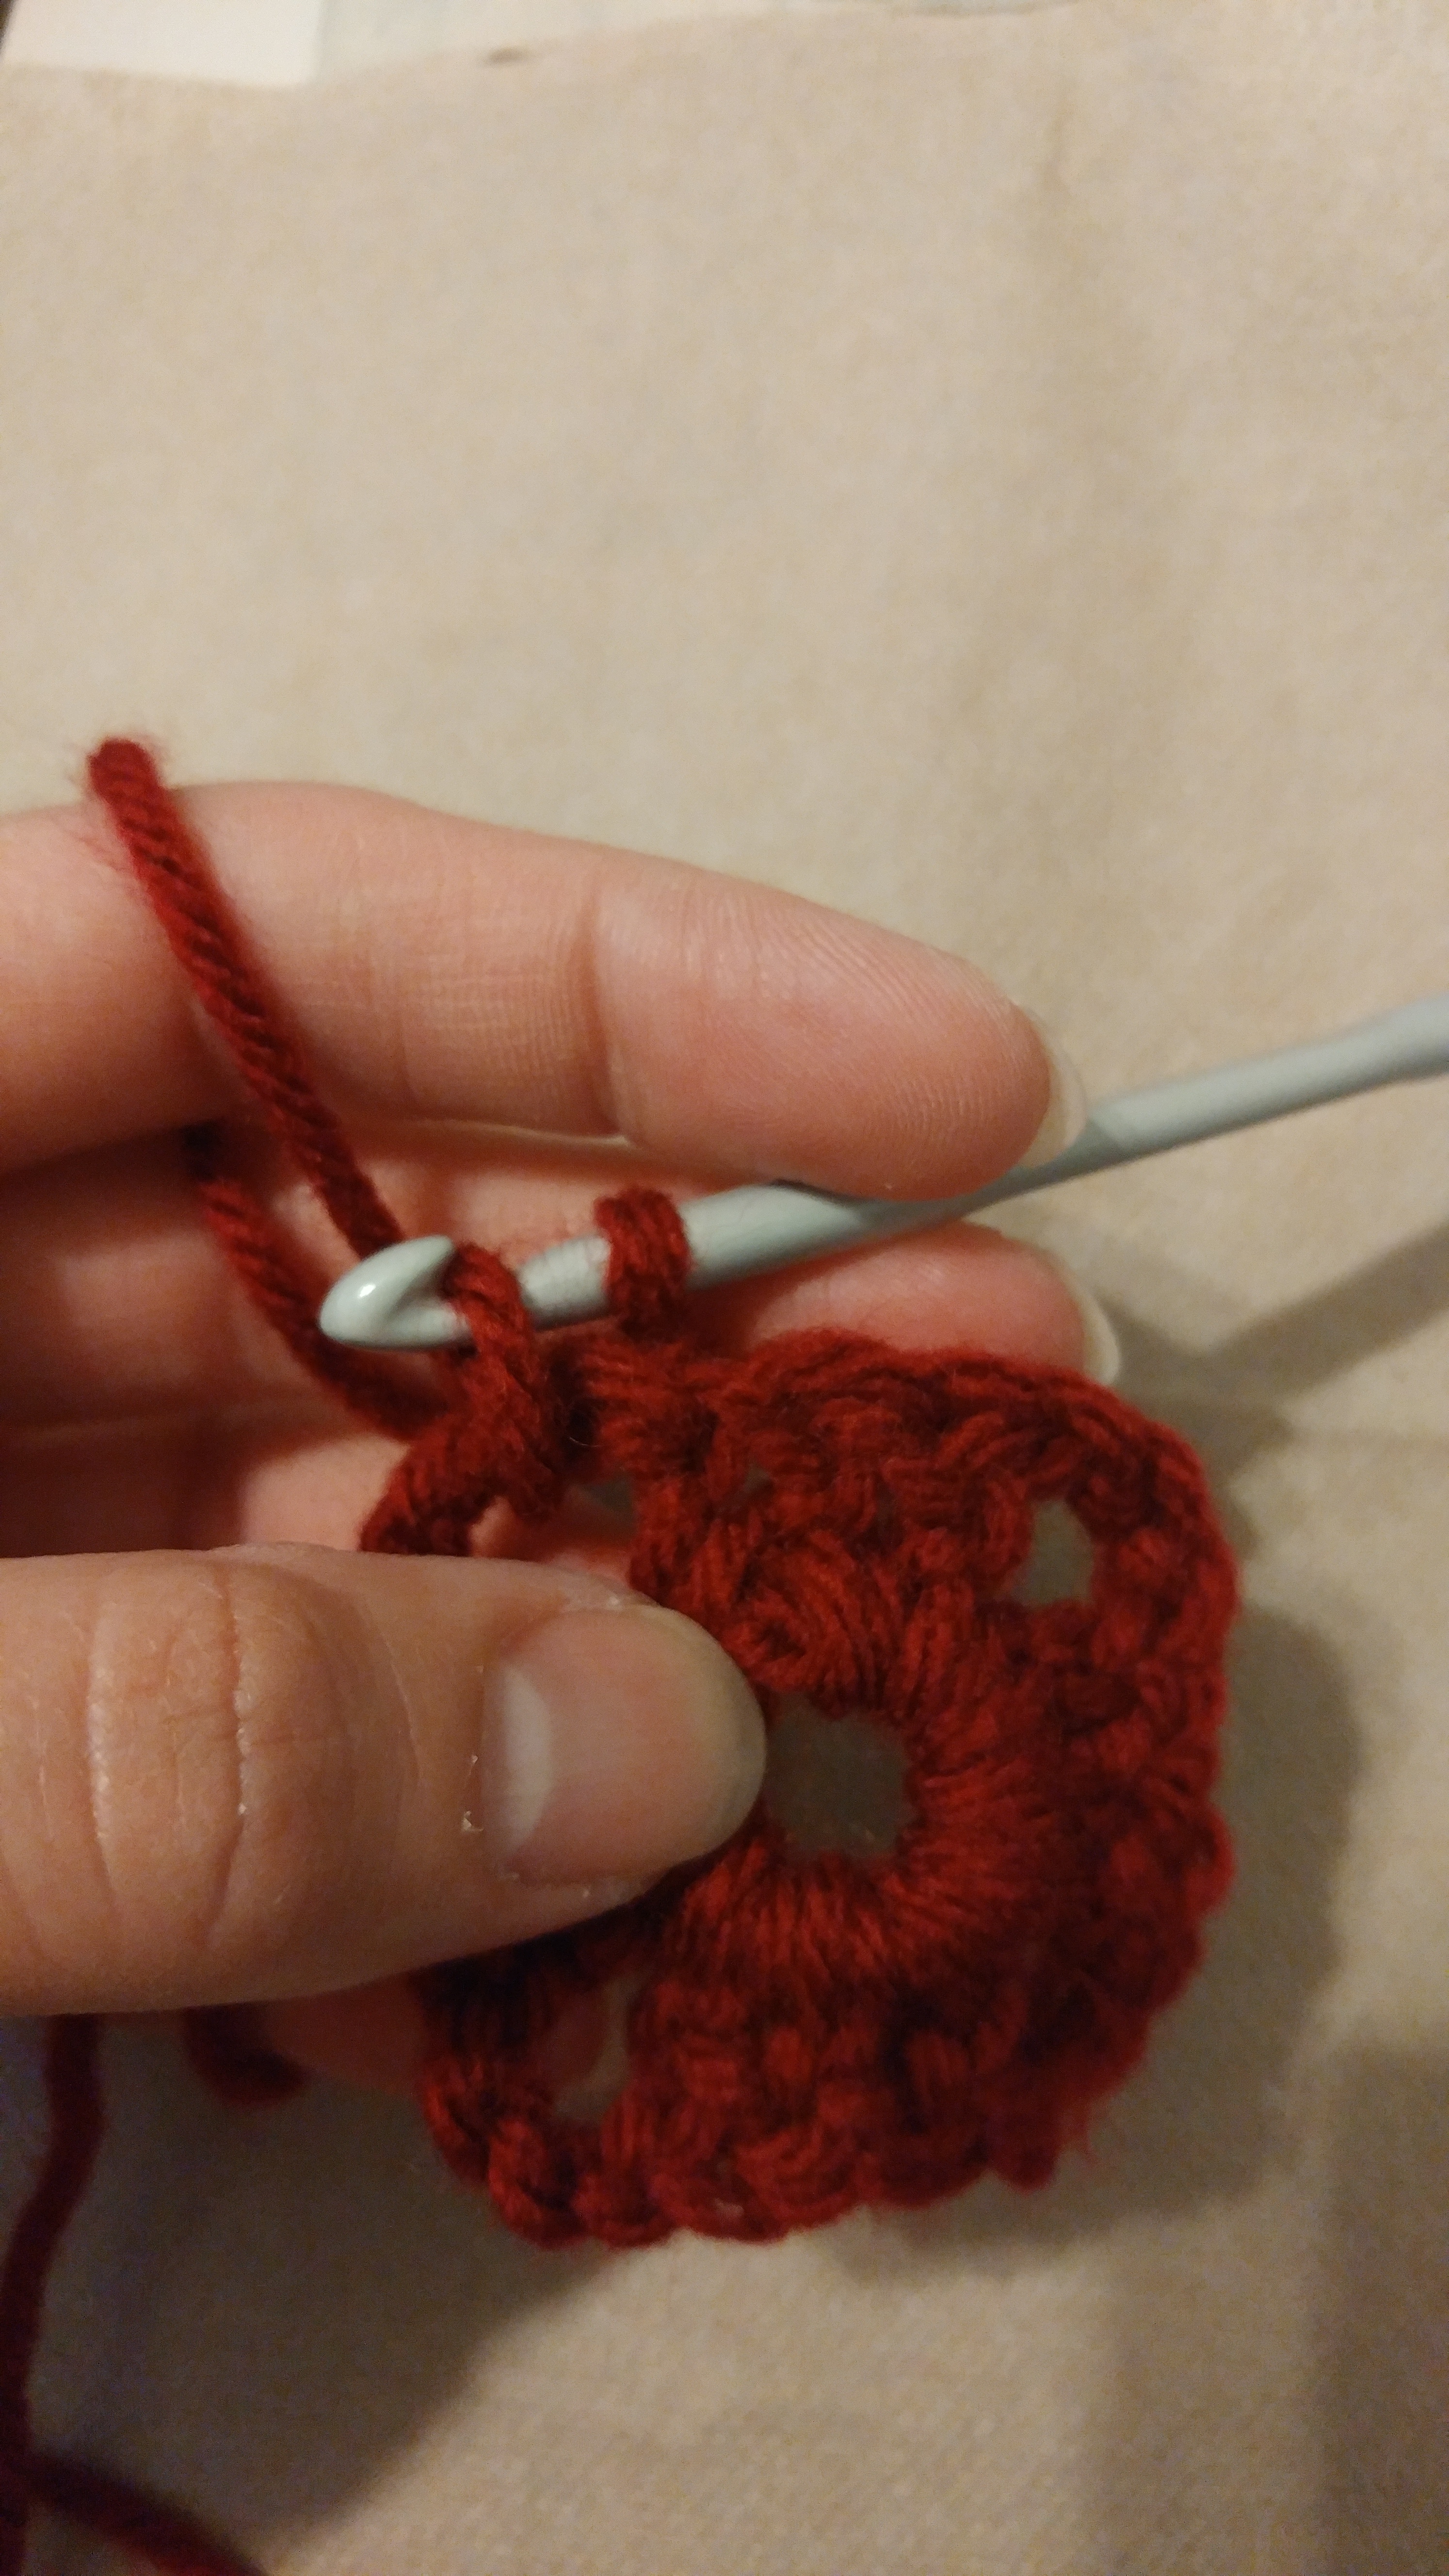
This is what it looks like when I turn the work and do the extra slip stitch.
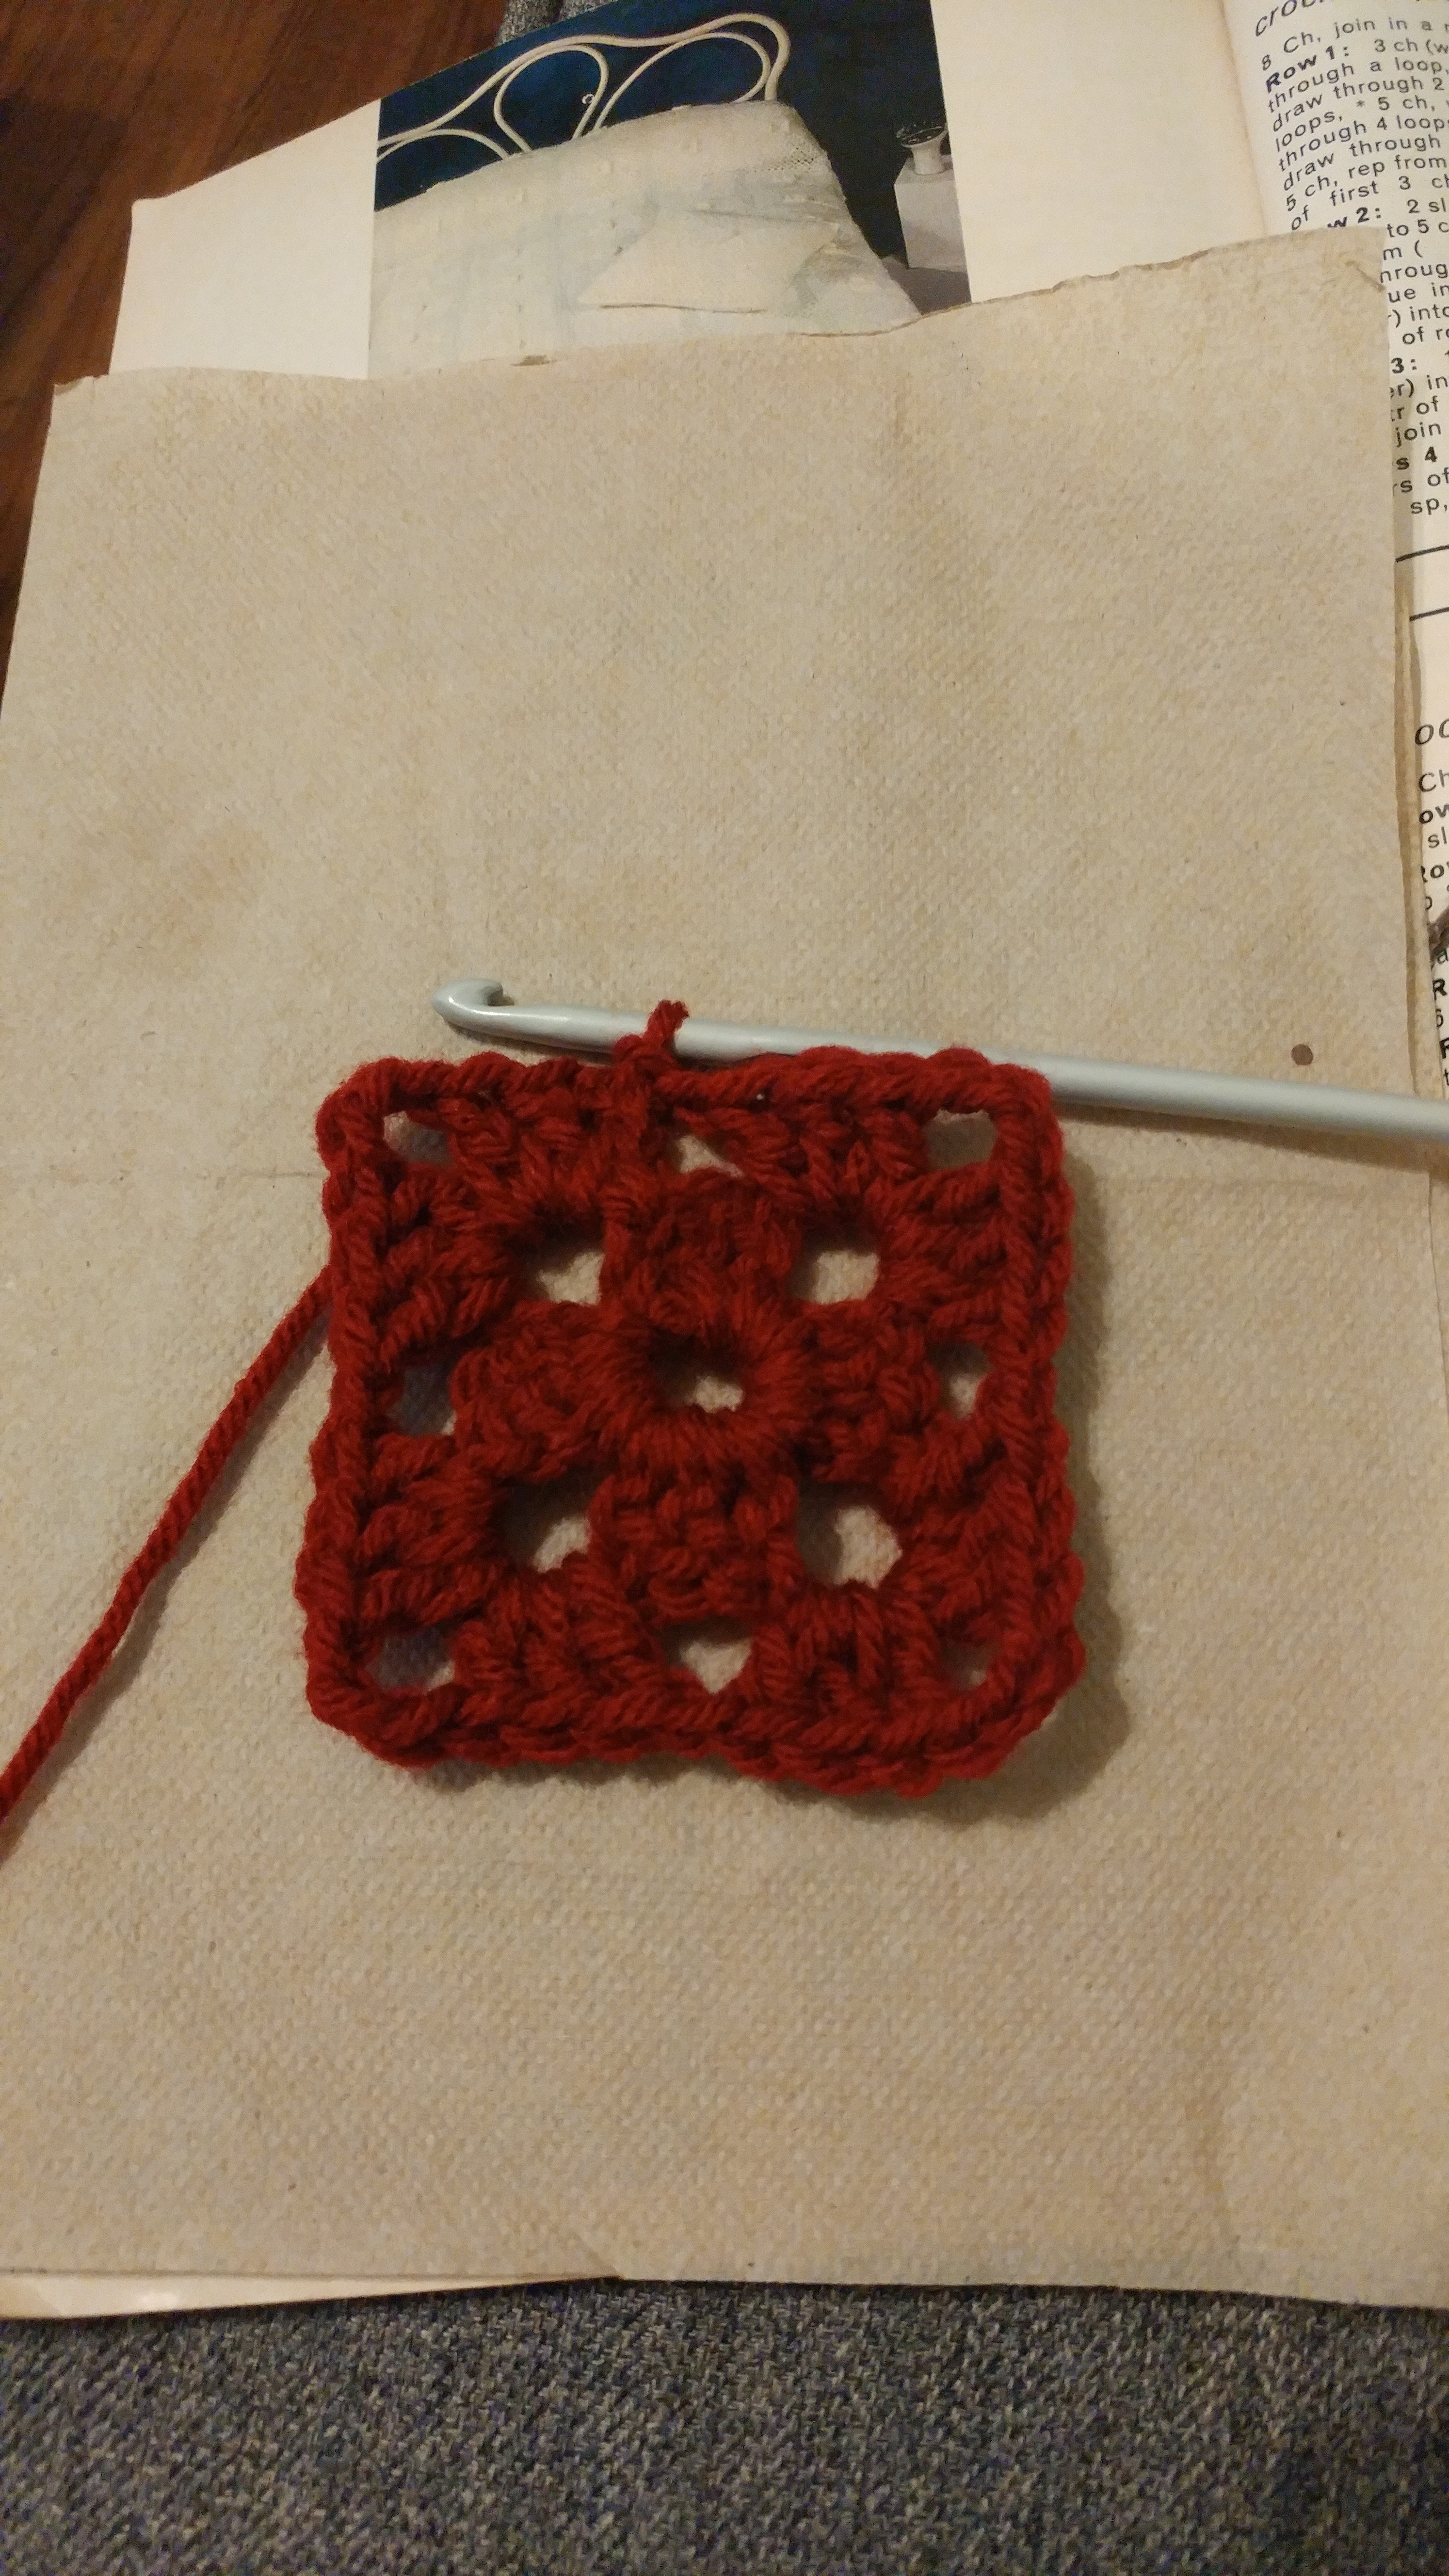
Row 2: (2 ch, 2 tr, 3 ch, 3 tr) into first 3 ch sp, * (1 ch, 3 tr, 3 ch, 3 tr) into next 3 ch sp, rep from * twice, join with a sl st.^

Row 3: (2 ch, 2 tr, 3 ch, 3 tr) into first 3 ch sp, * 1 ch 3 tr into 1 ch sp (1 ch, 3 tr, 3 ch, 3 tr) into each corer, rep from * ending 1 ch, sl st to join.^
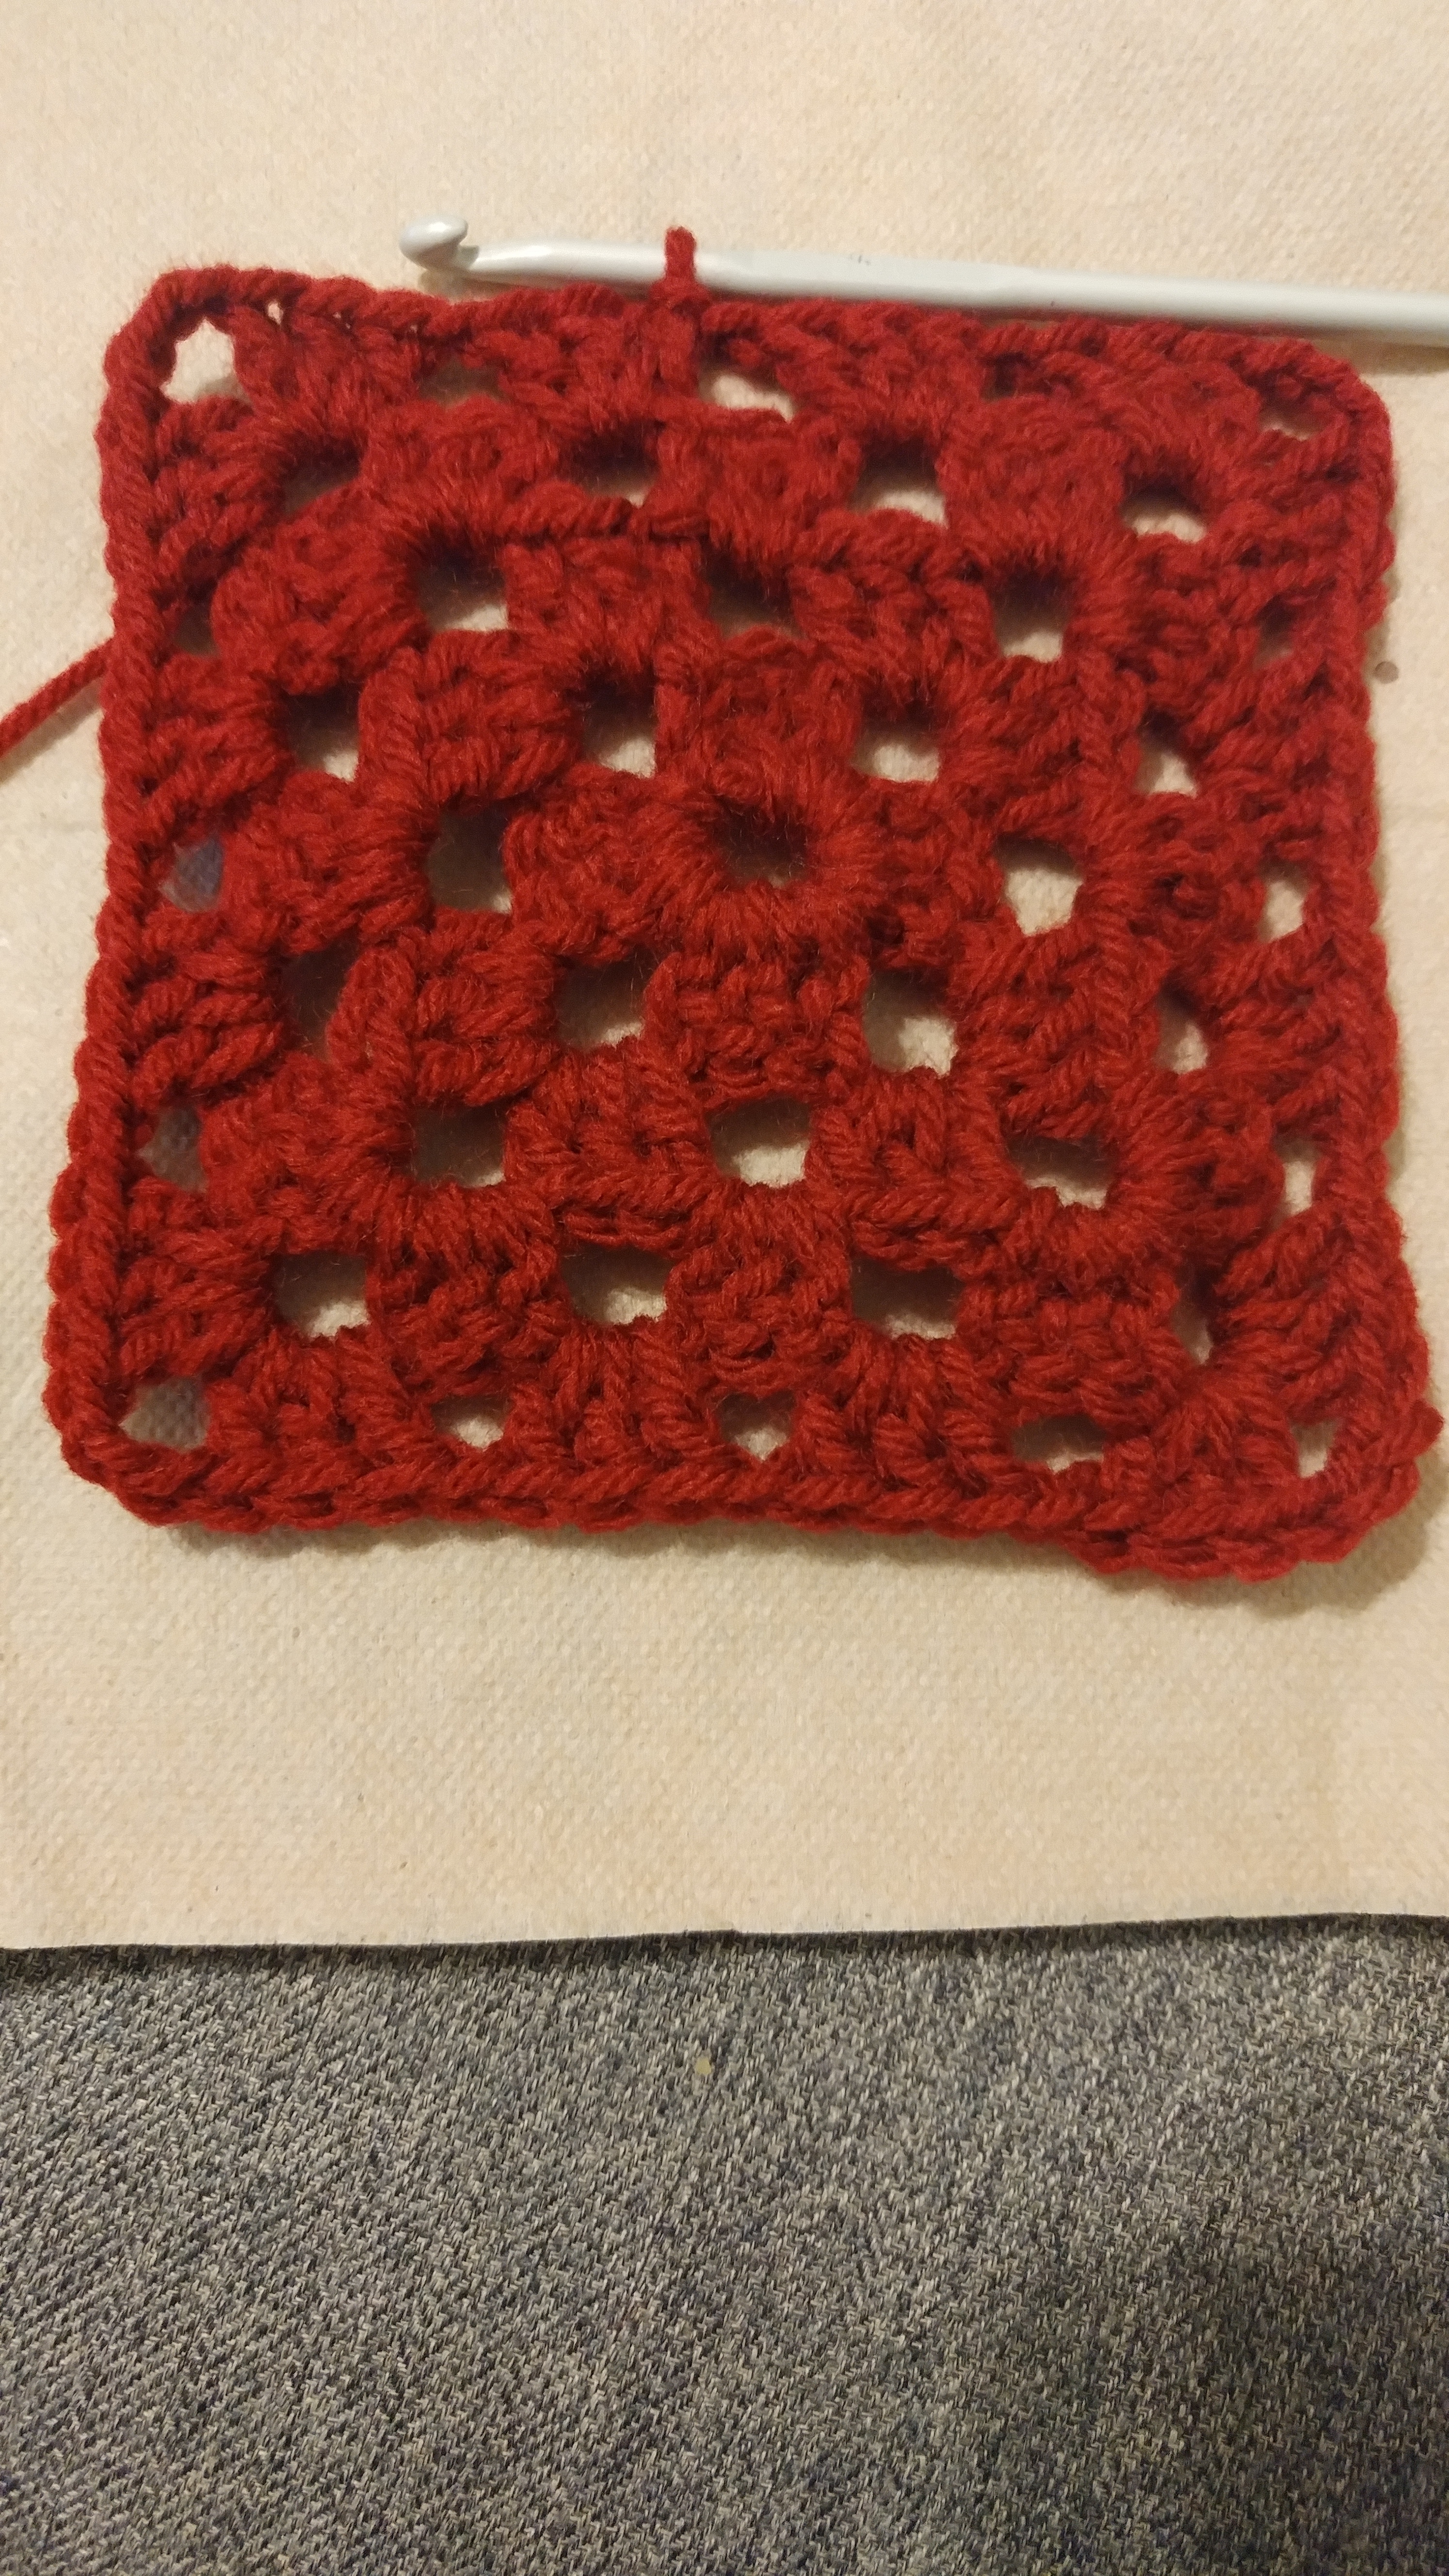
Row 4: (2 ch, 2 tr, 3 ch, 3 tr) into first 3 ch sp, * 1 ch 3 tr into each 1 ch sp (1 ch, 3 tr, 3 ch, 3 tr) into each corner, rep *, ending 1 ch, sl st to join.^
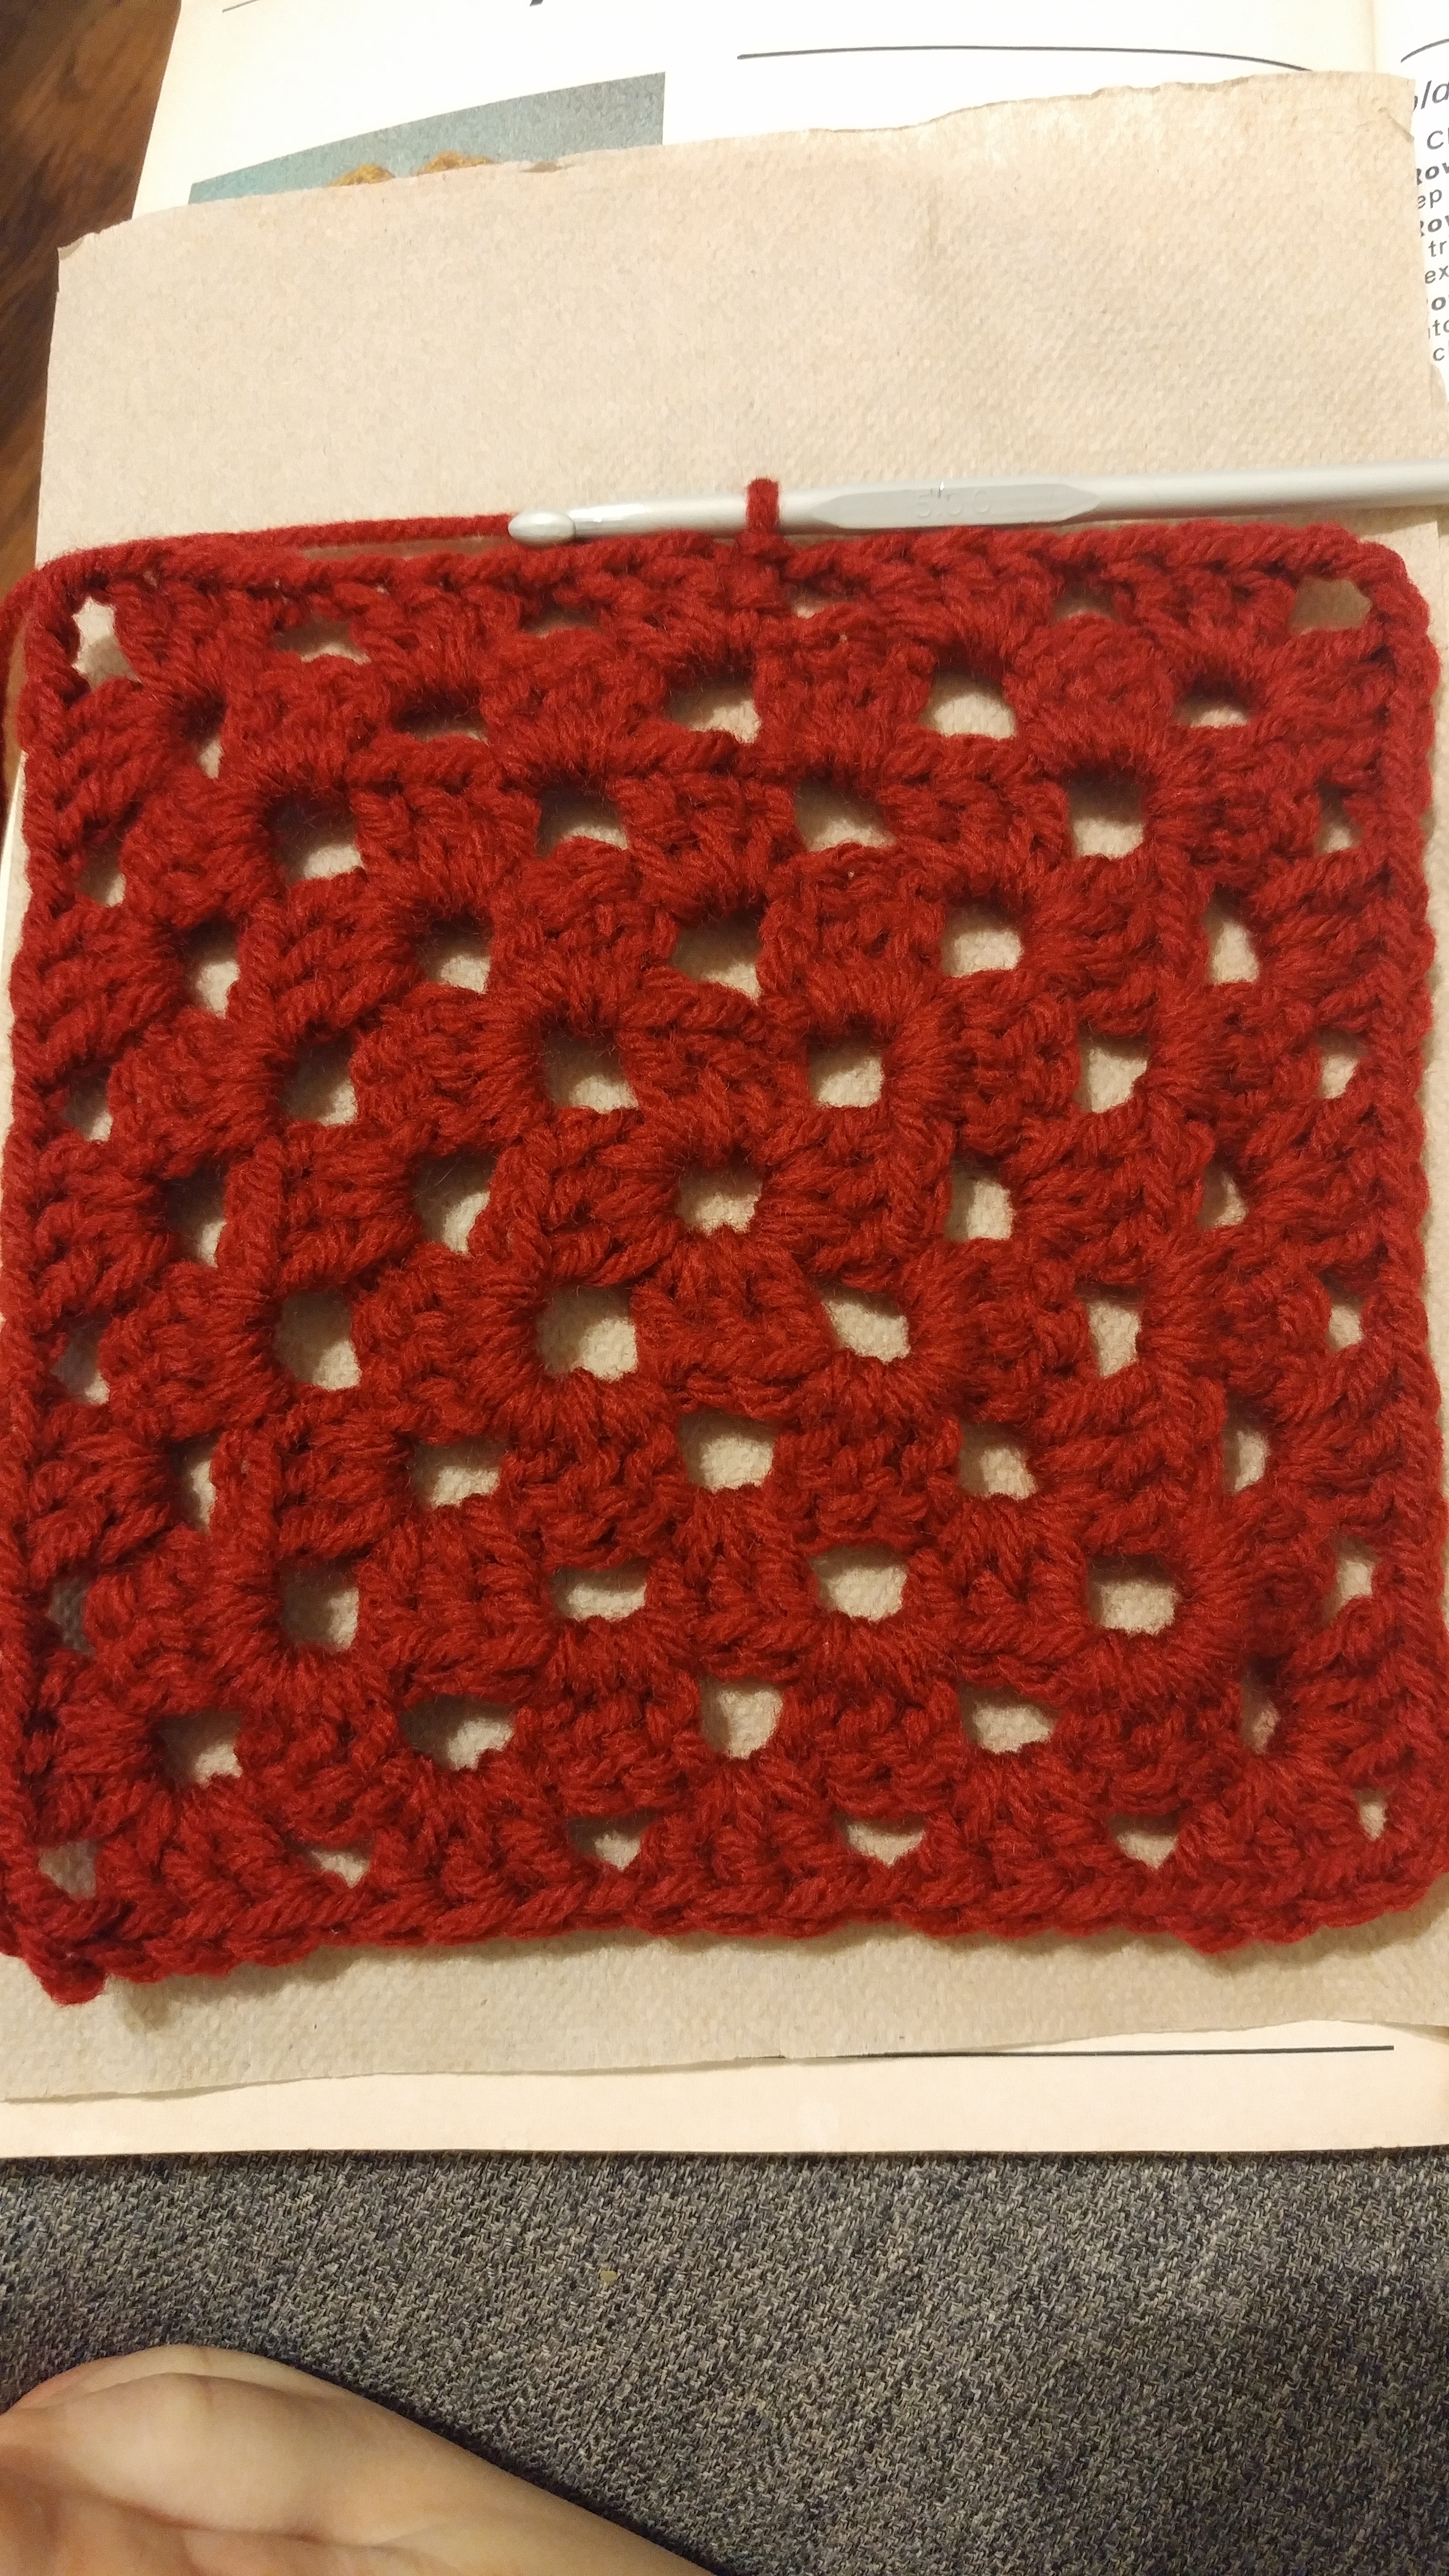
Row 5: (2 ch, 2 tr, 3 ch, 3 tr) into first 3 ch sp, * 1 ch 3 tr into each 1 ch sp (1 ch, 3 tr, 3 ch, 3 tr) into each corner, rep *, ending 1 ch, sl st to join.^
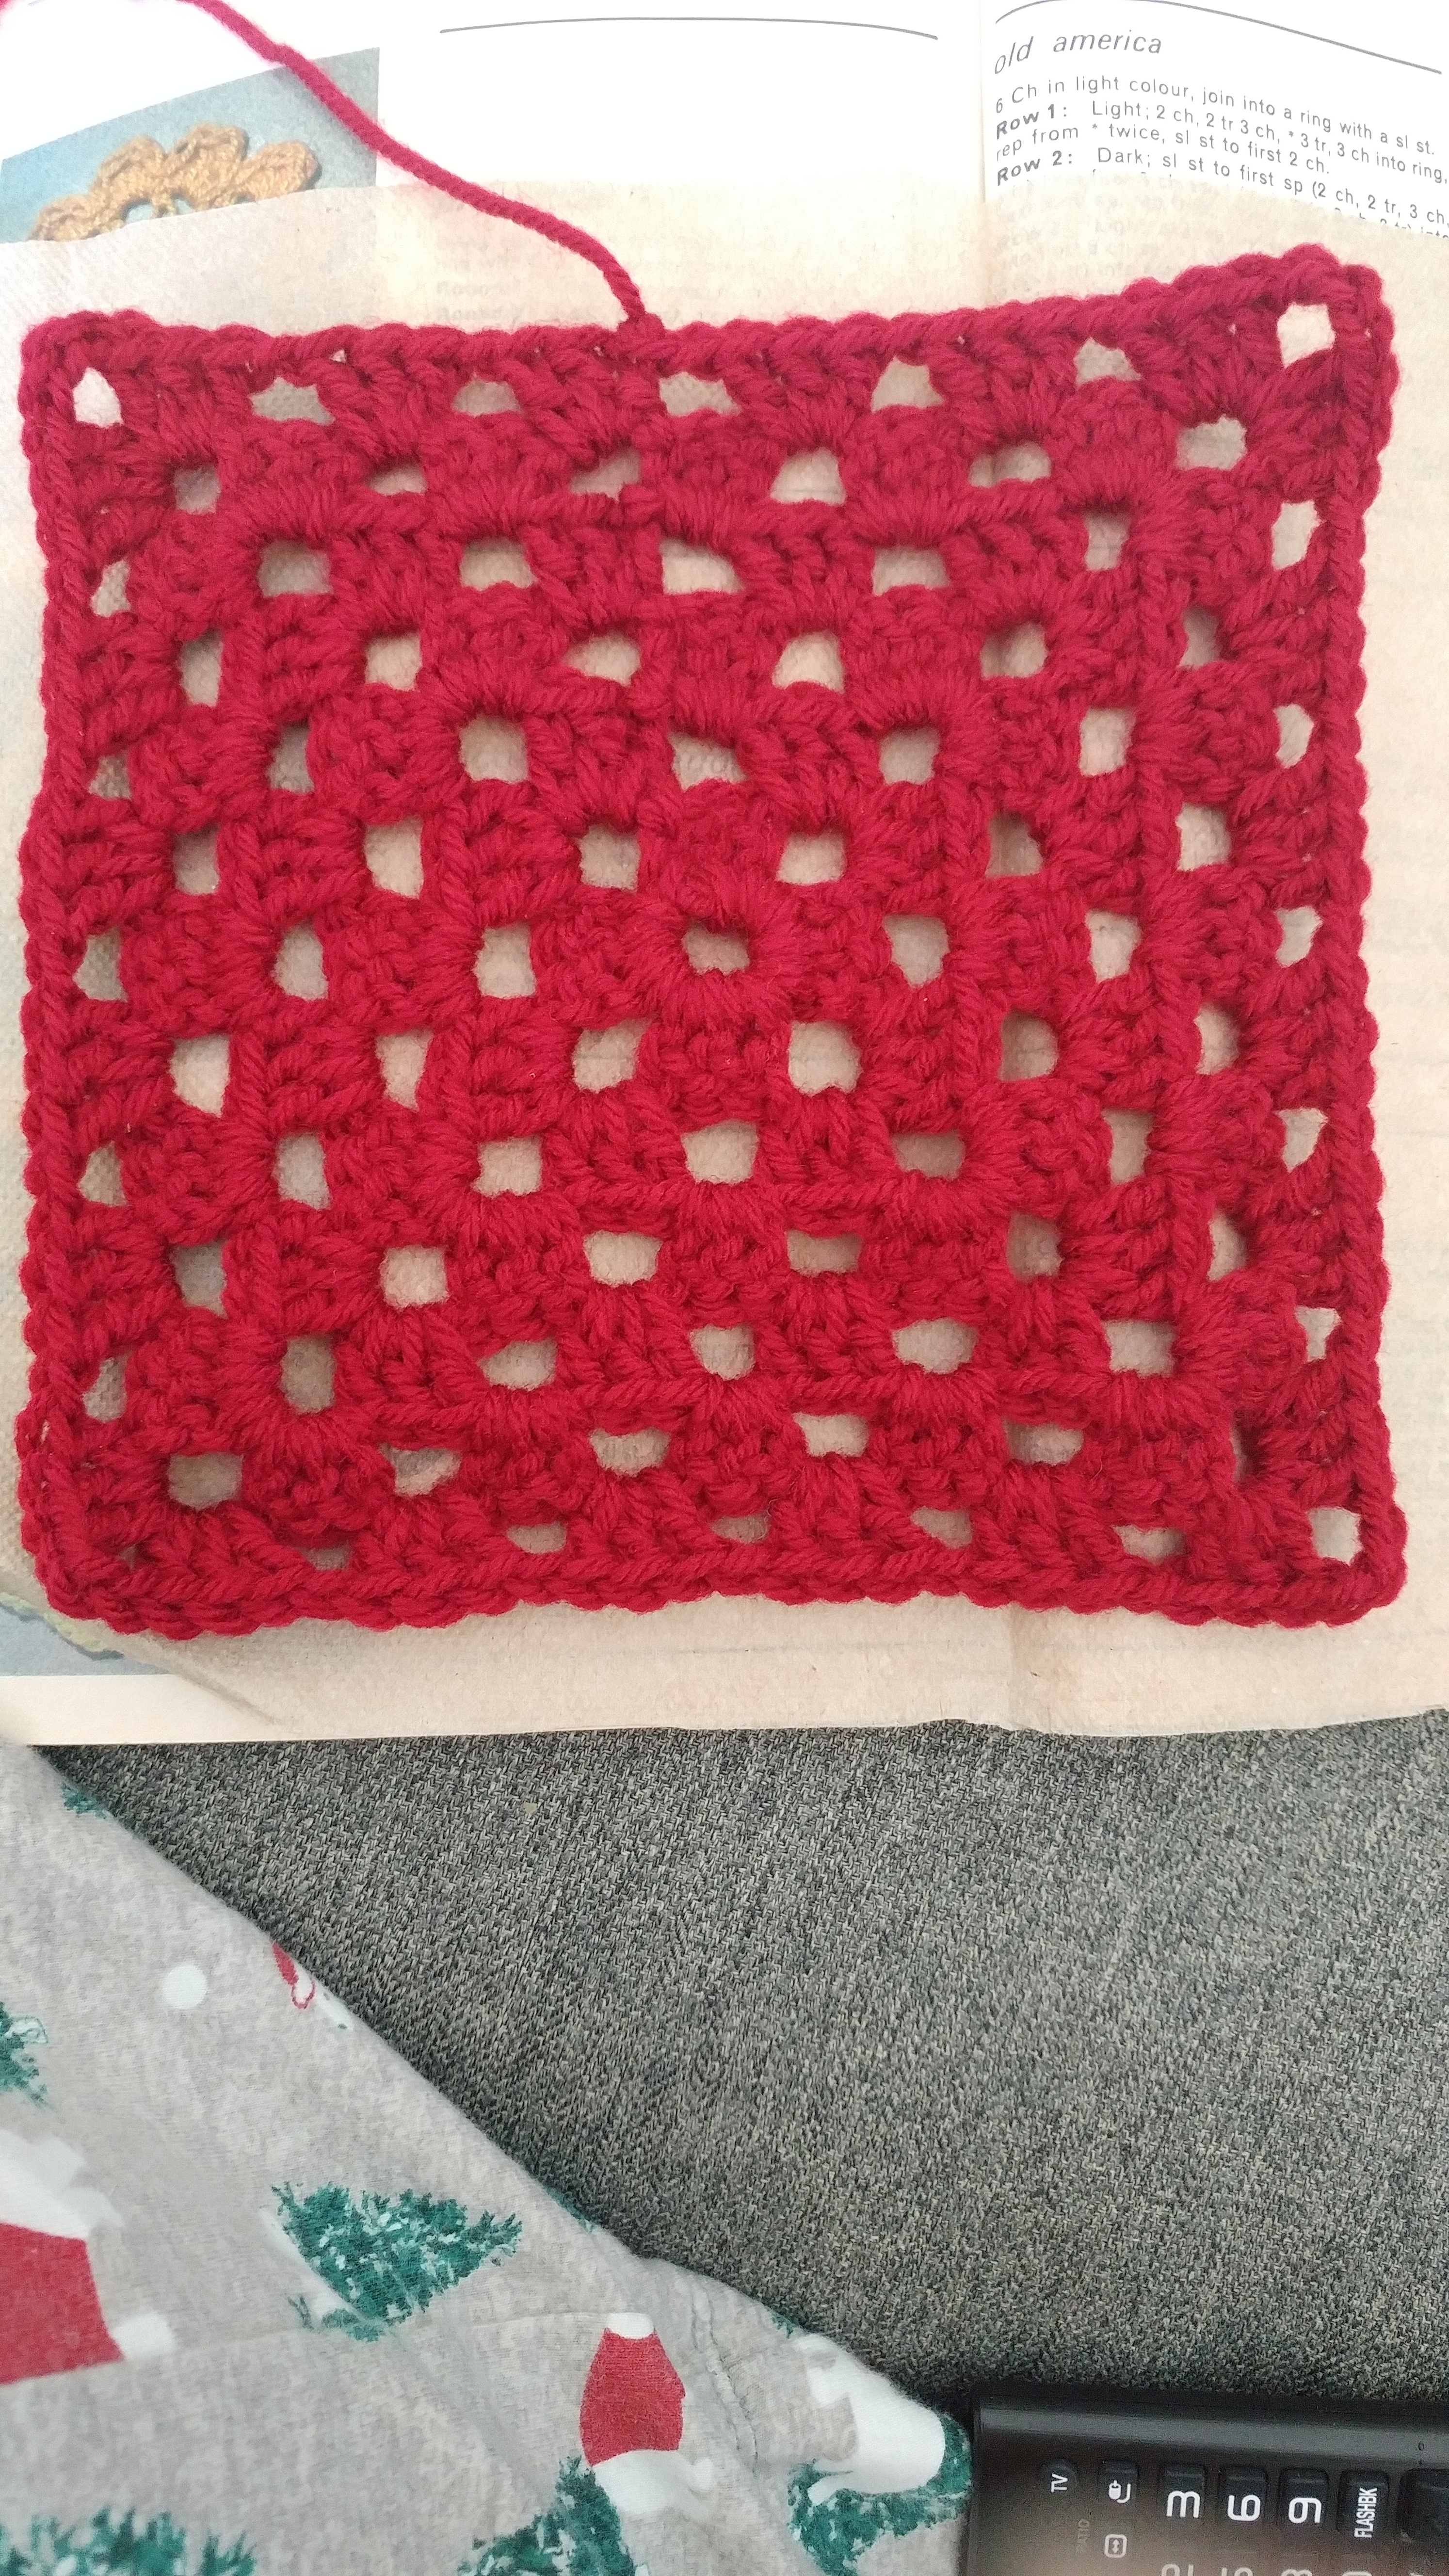
Row 6: (2 ch, 2 tr, 3 ch, 3 tr) into first 3 ch sp, * 1 ch 3 tr into each 1 ch sp (1 ch, 3 tr, 3 ch, 3 tr) into each corner, rep *, ending 1 ch, sl st to join.^
NOTE: If not switching colours for the square, you do actually HAVE to turn the work between each round. (I didn't realize this until I forgot to do so one time.) This is brcause the pattern necessitates working into the spaces, and without turning you end up facing a solid area. For switching colours each round, the pattern alternates colours (frex 1 & 3 light, 2 & 4 dark) and the new colour is joined with a slip stitch to the first space.
Instructions for the border
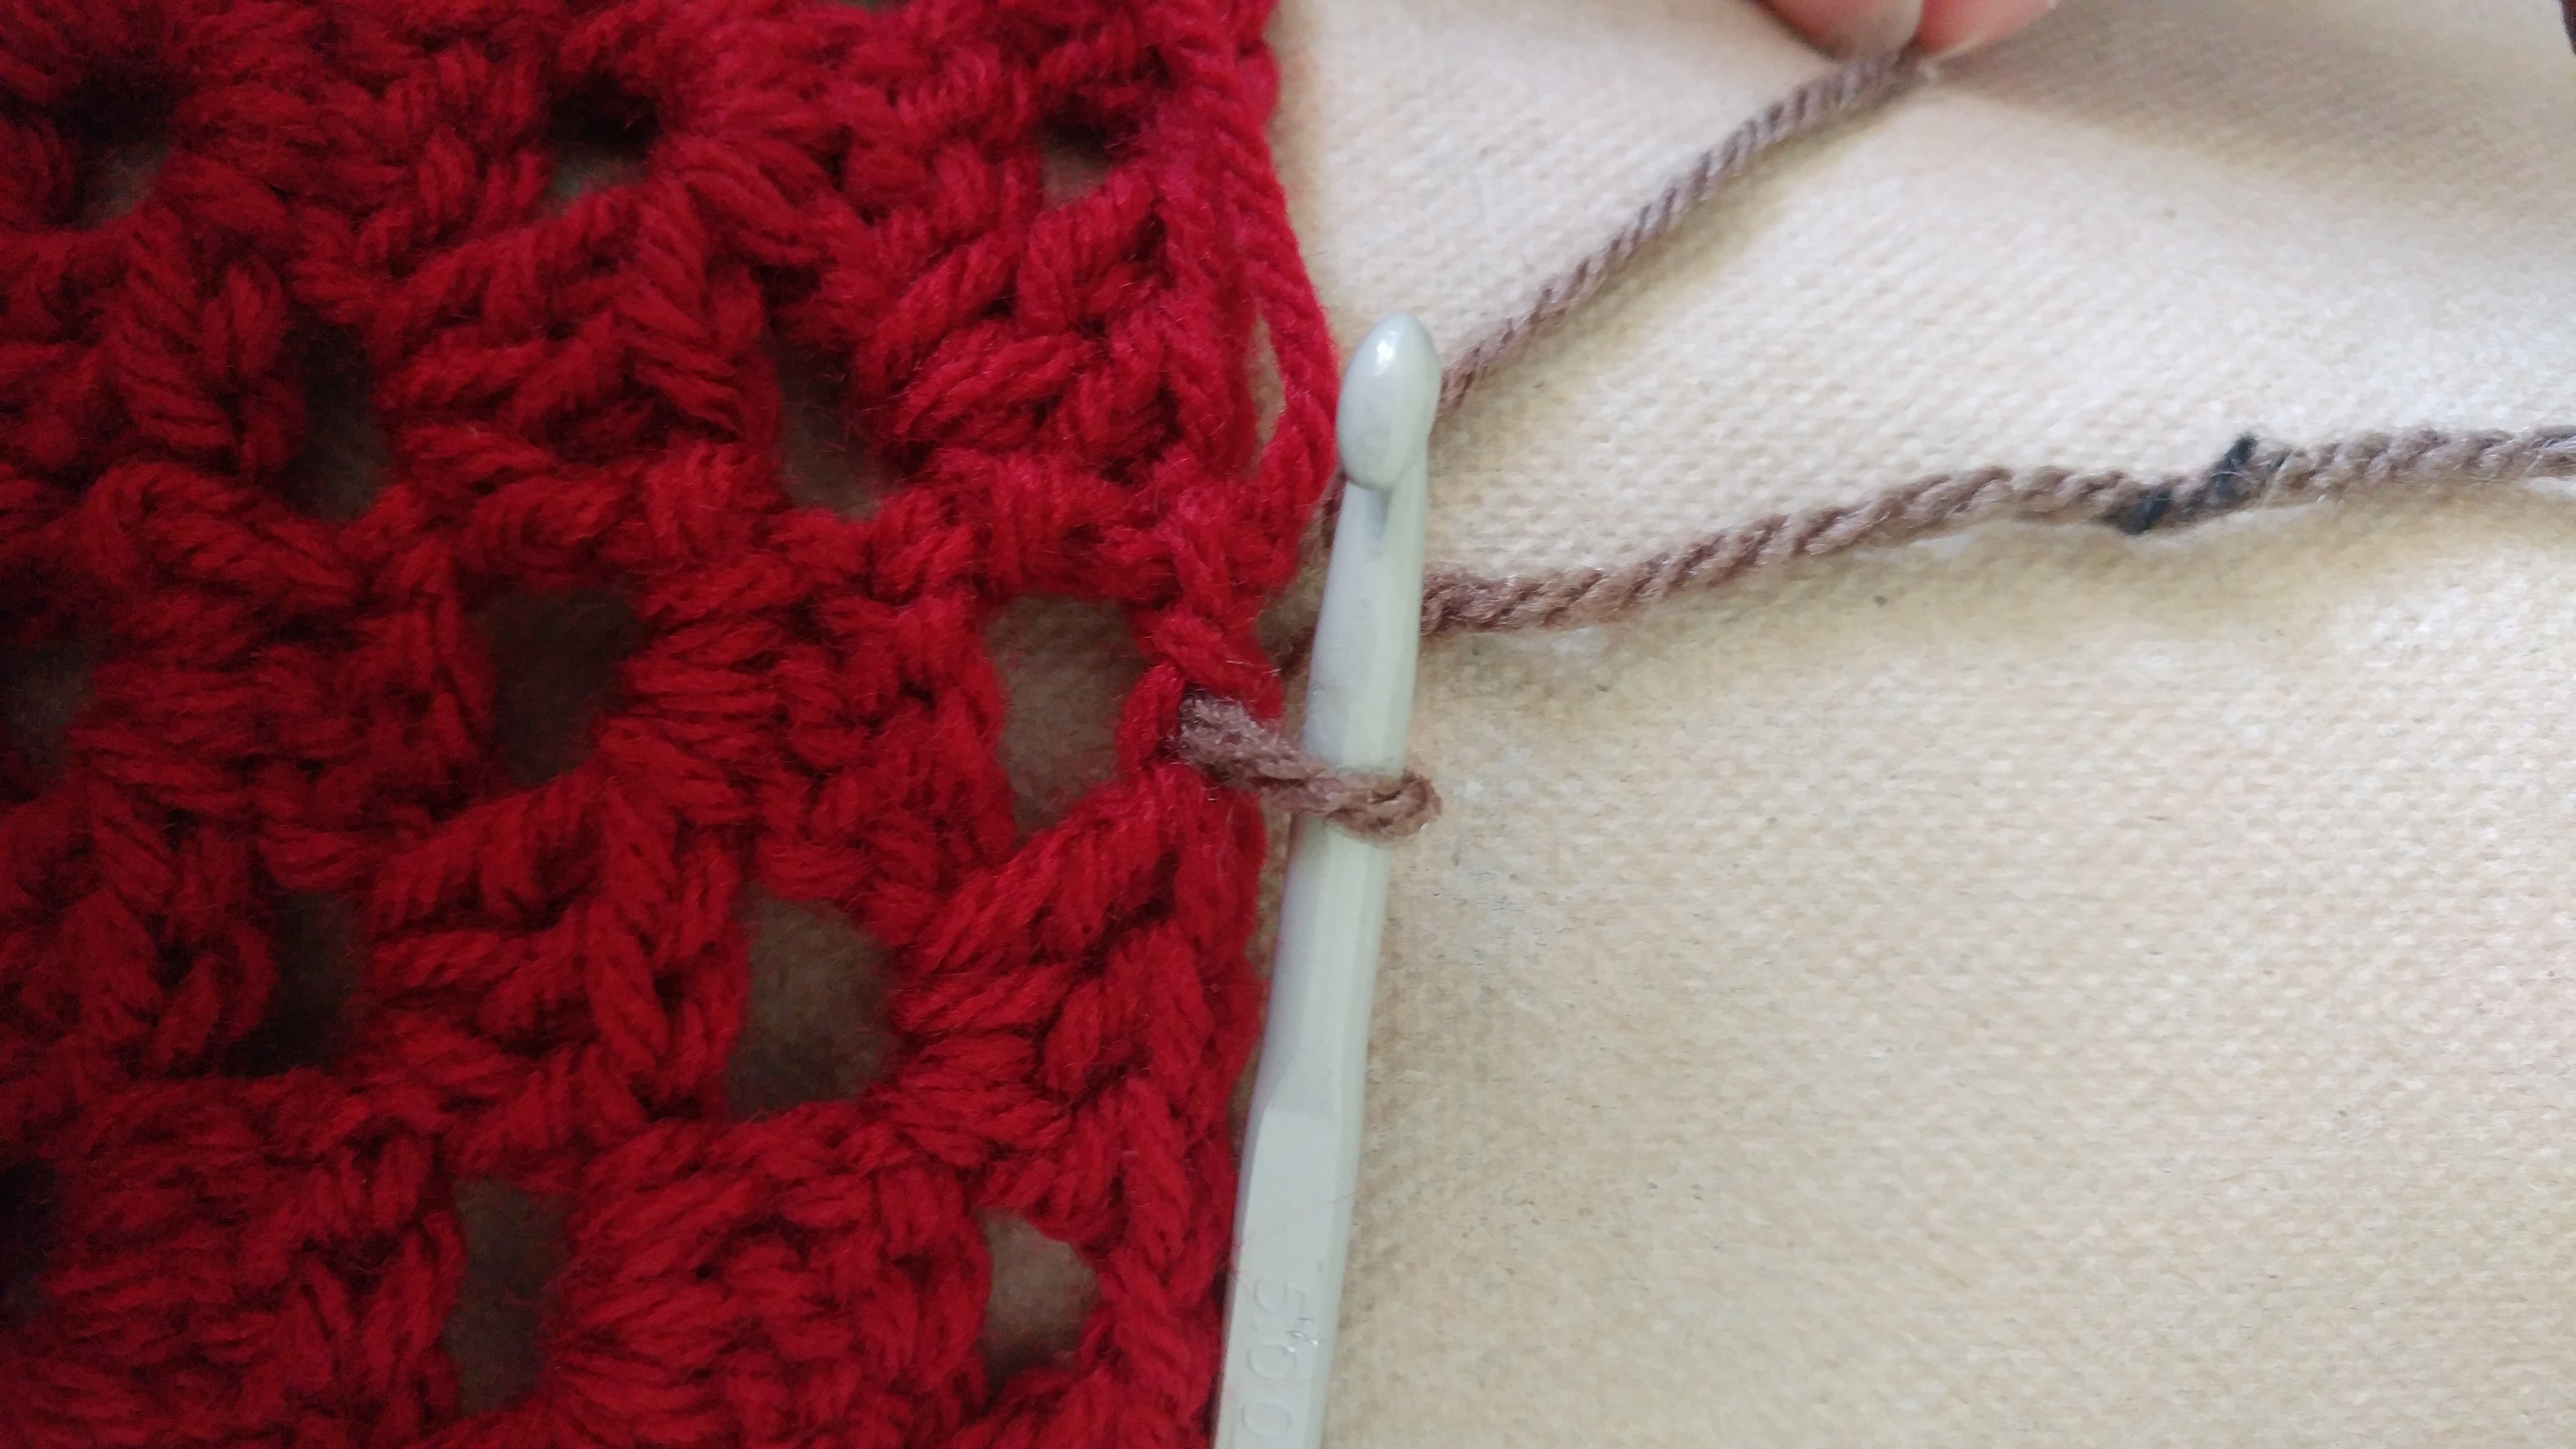
Join the walnut by pulling a loop through. I did this just behind the finishing knot for the Claret, but you can join it anywhere.
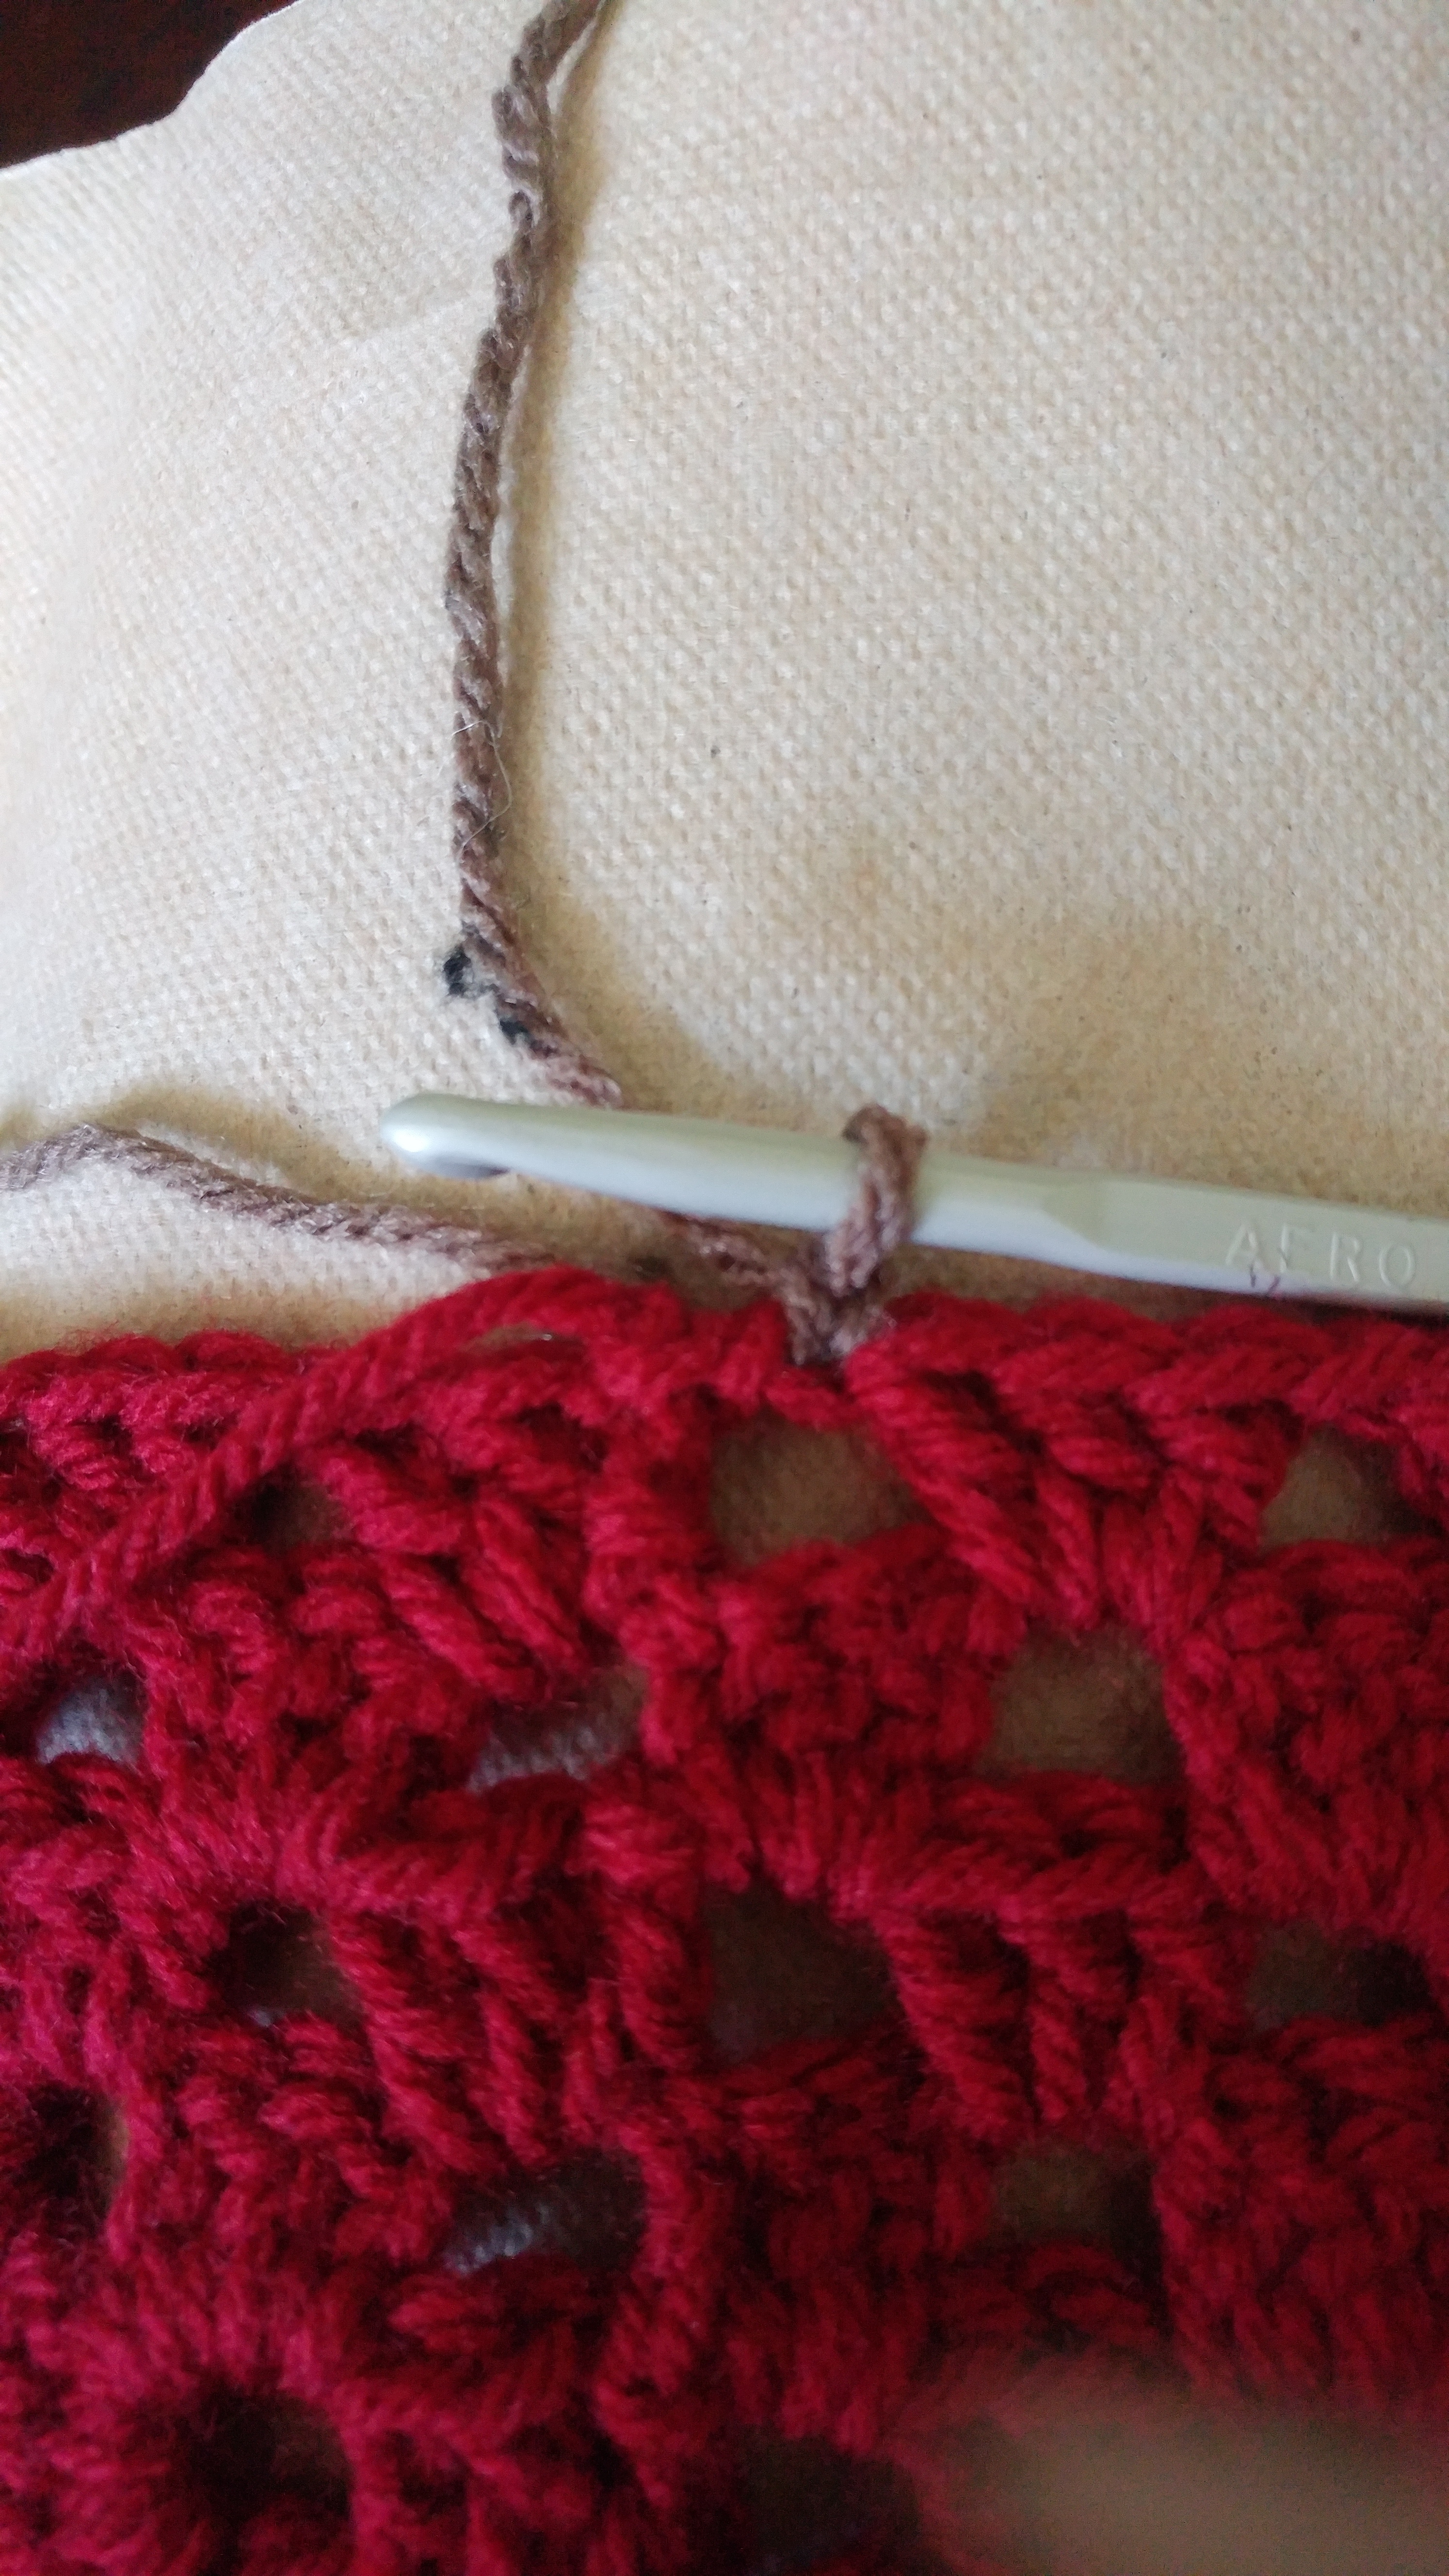
After making the first join, chain one to lock everything into place. Put one double crochet into the next stitch, and continue on this way until you reach the corner.
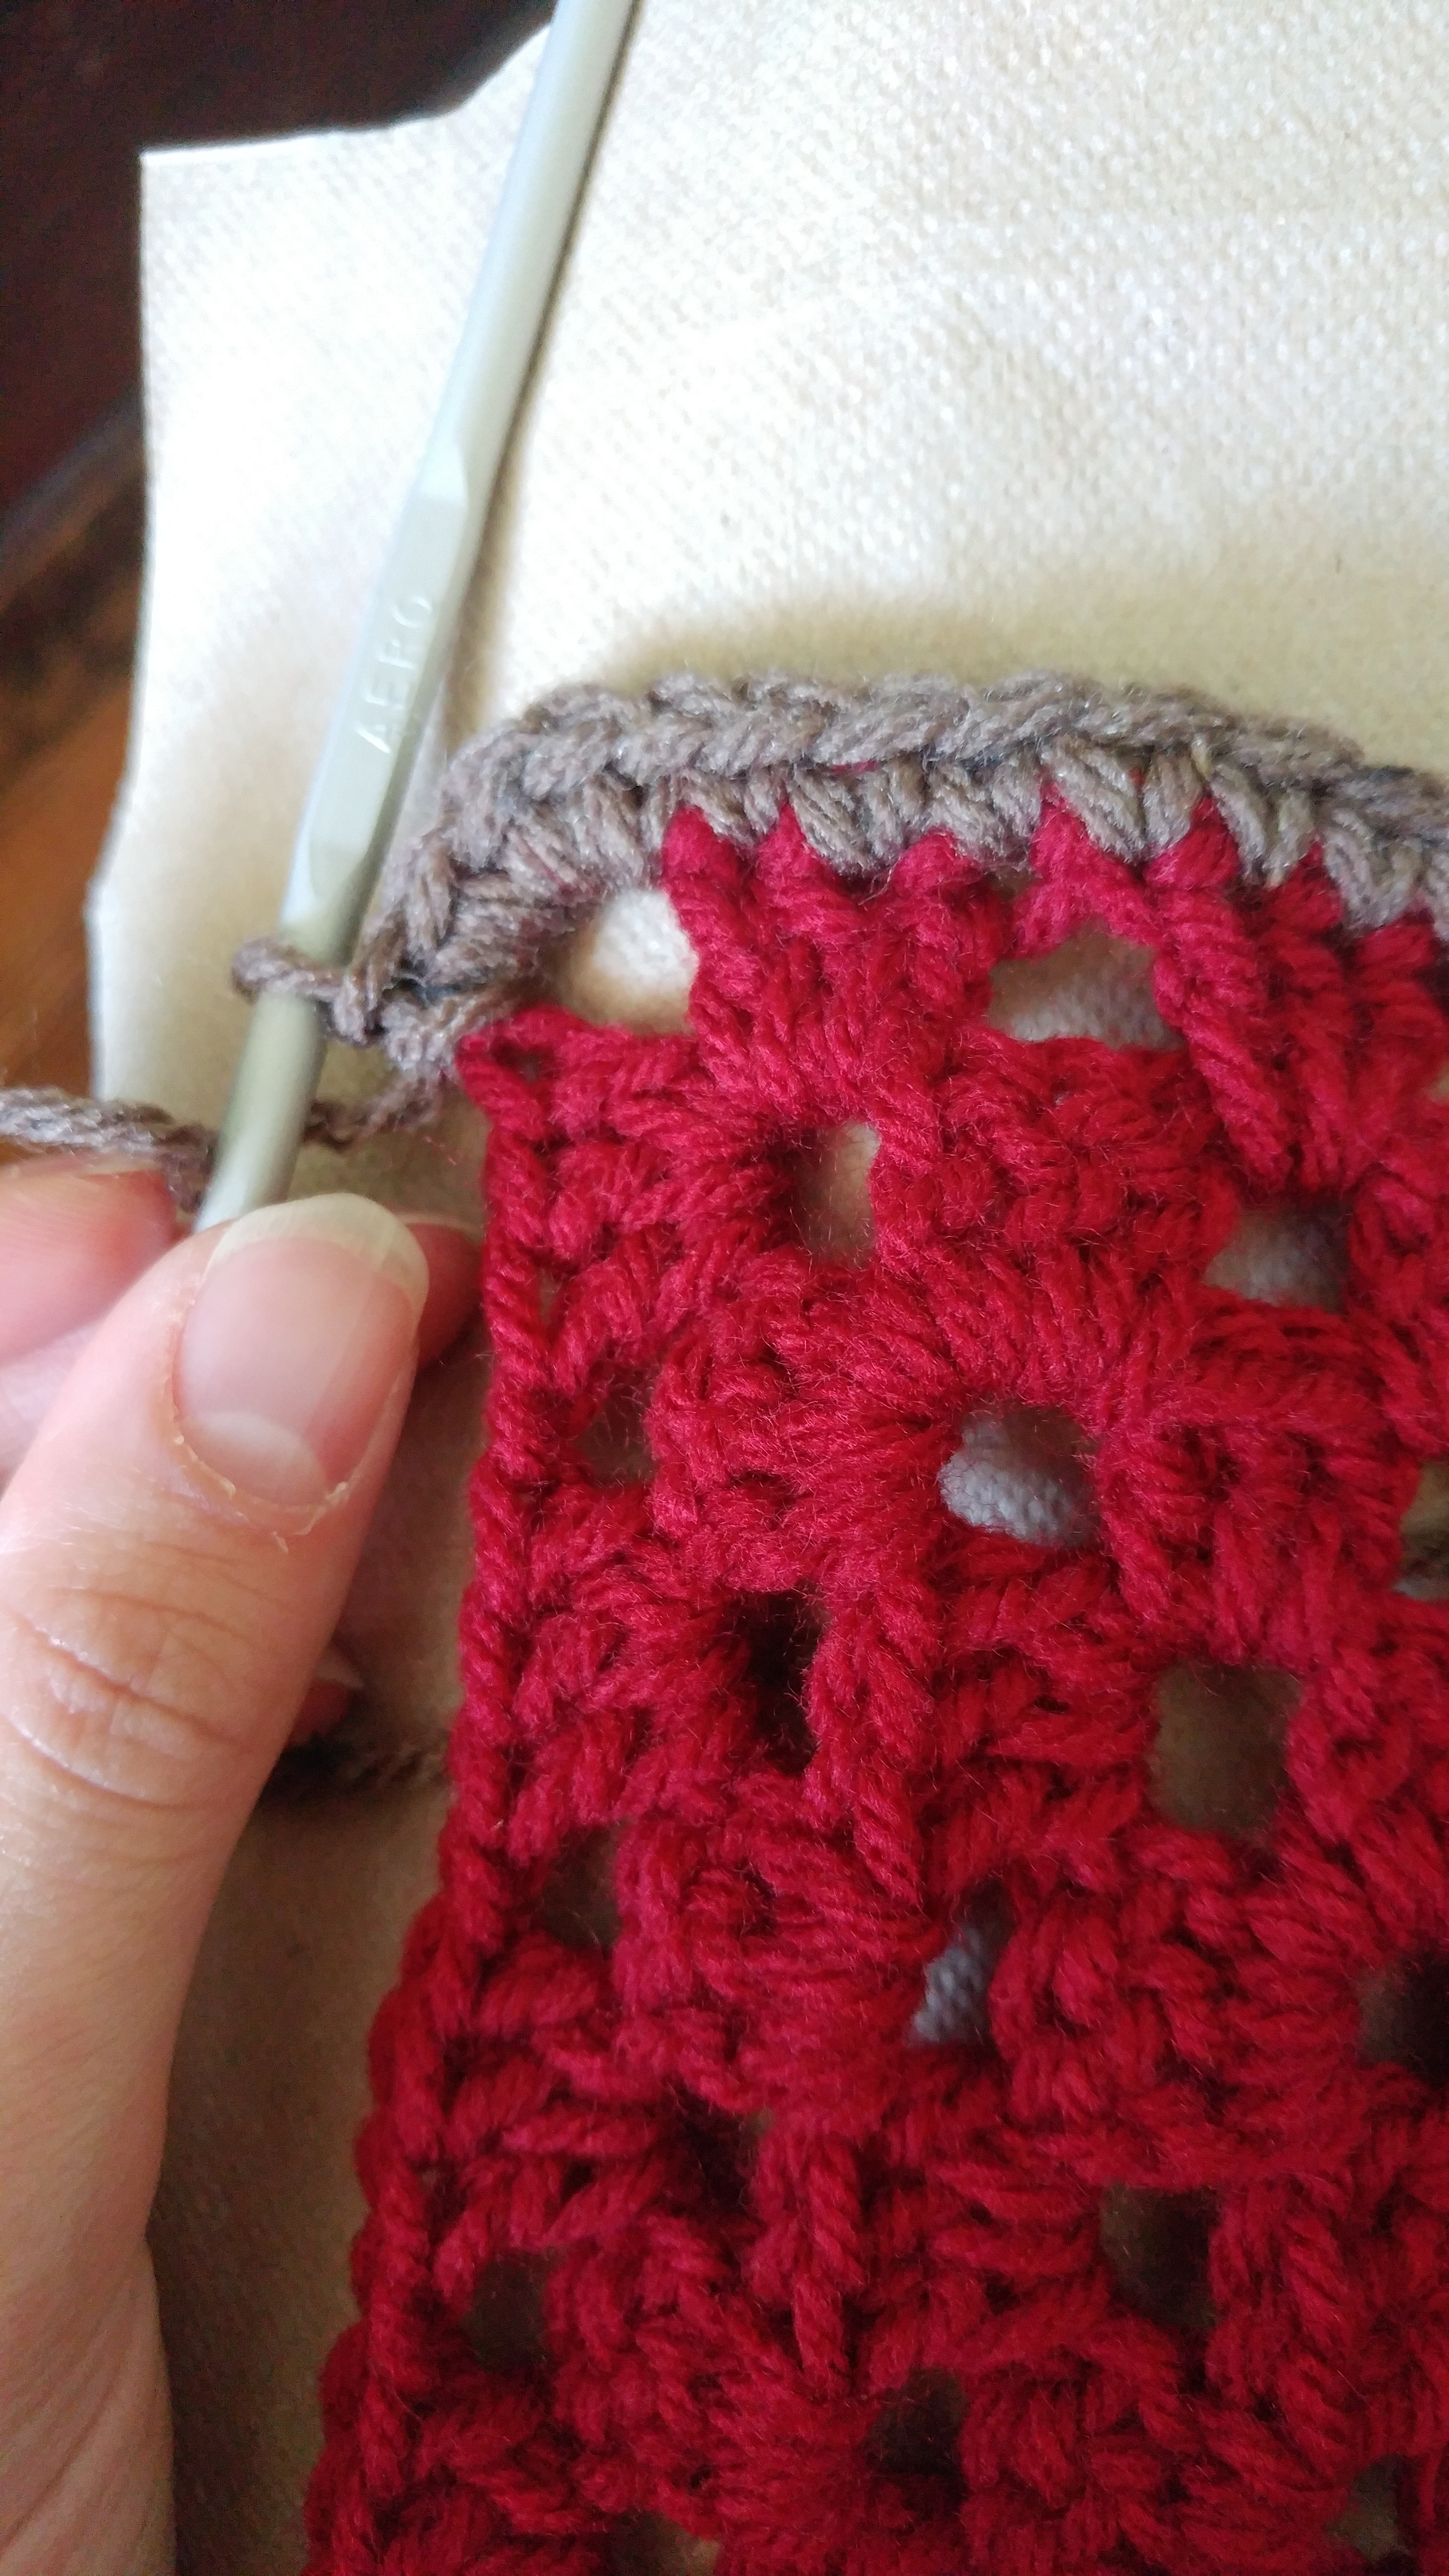
Upon reaching the corner, put five double crochets into the corner space, then continue on as before, putting one double crochet into each stitch, treating all remaining corners as the first.
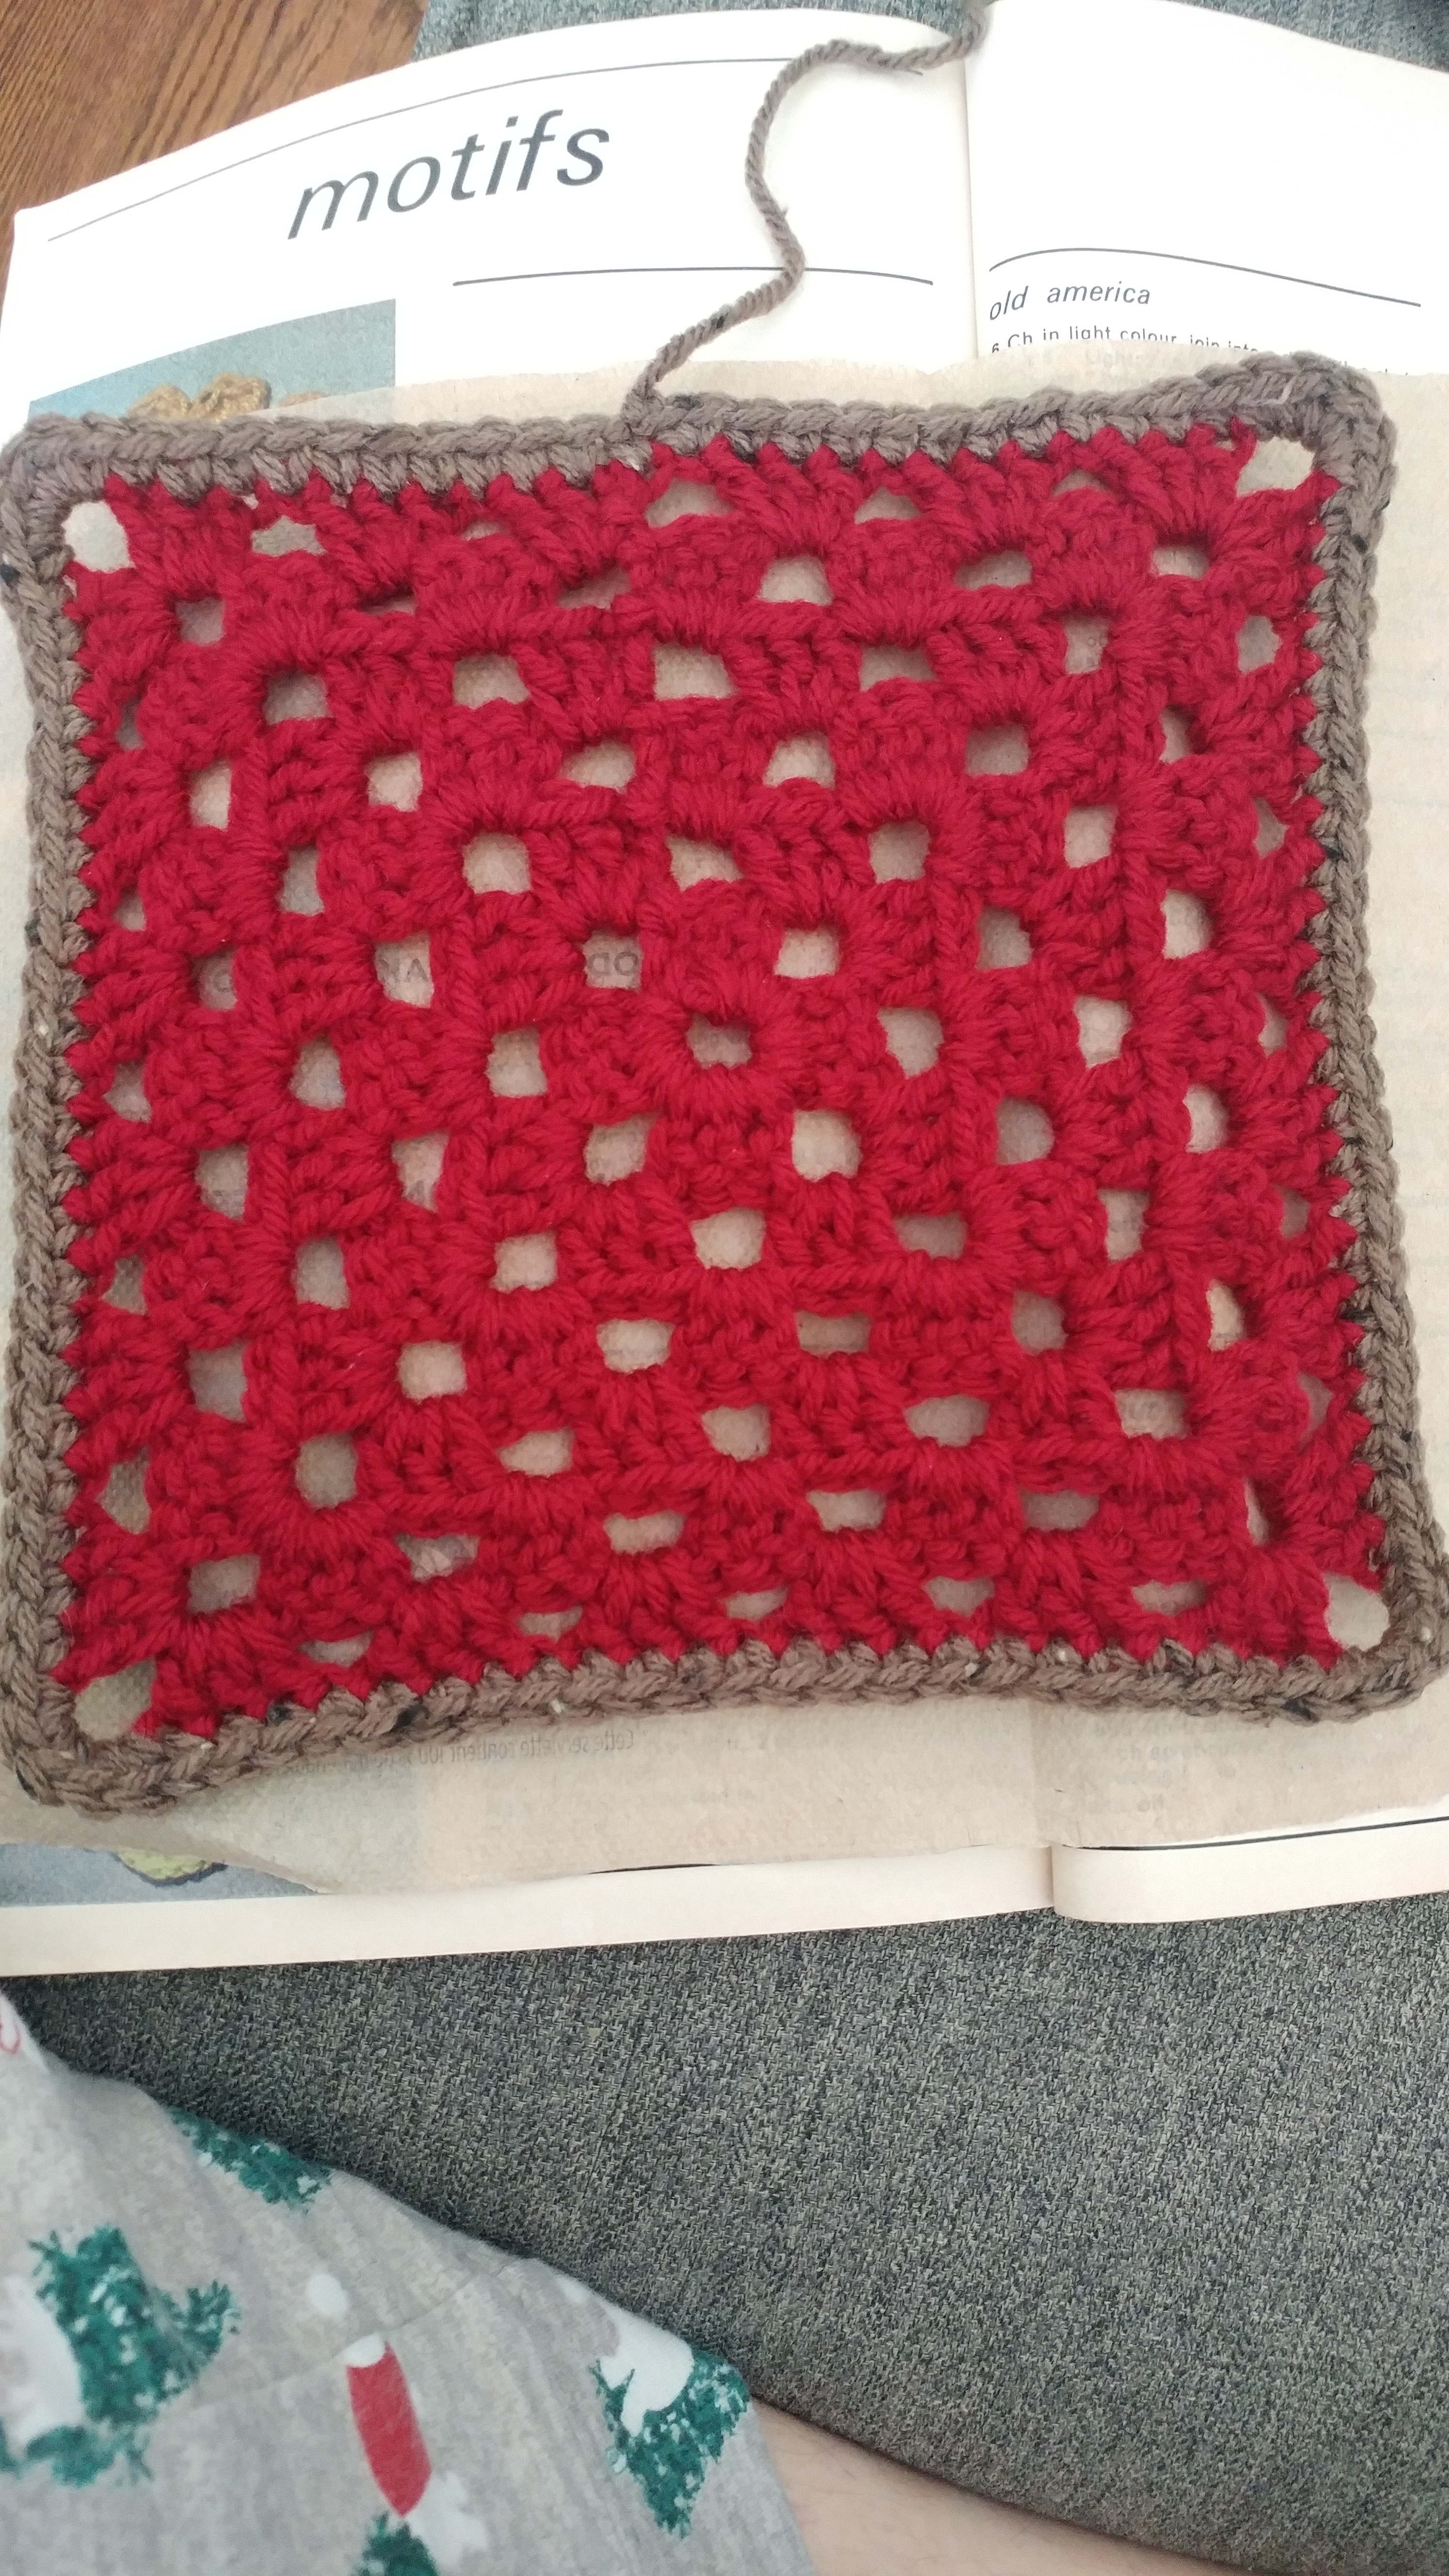
When you get back to the starting point, join with a slip stitch and fasten off.
I will make a similar post with the pattern for my "fancy" square sometime soon. I will be switching patterns anytime the colour switches, but you certainly don't have to if you decided to try this. You could use only one pattern, or you could set your own conditions for switching patterns. Whatever suits you best.
The square was for Friday June 4, it was 30 degrees Celsius with no rain, so the square is Claret and the border is Walnut Tweed, both "Impeccable Loops & Threads" yarn.
List of relevant abbreviations
***English terms, American terms will be in brackets
Wrh = wool round hook (I always say this as wrap round hook in my head)
Ch = chain
Sl st = slip stitch
Sc = single crochet (Amer. = slip stitch)
Dc = double crochet (Amer. = single crochet)
Tr = treble crochet (Amer. = double crochet)
Dble tr = double treble crochet (Amer. = treble crochet)
Sp = space
**I'm going to copy the patterns from the book as is, so all abbrevations will be referring to the English terms. For consistency's sake, any time I need to talk about a stitch or add instructions, I will also be using the English terms, even though I'm used to my grandma using the American ones. If anything is unclear, let me know, and I'll do my best to clarify.
Patterns from Mon Tricot Knitting Dictionay 900 Stitches Patterns (I'm not certain of the year)
Old America
Pattern for the "plain" square:
*In the book, this pattern switches colours, but I'm using only one colour per square so I will leave put the colour switching instructions. I am also going to six rounds instead of four, so I will write in the last two rounds myself.

6 Ch, join into a ring with a sl st.

Row 1: 2 ch, 2 tr 3ch, *3 tr, 3 ch into ring, rep from * twice, sl st to first 2 ch.^
^My grandma always says to turn the work between each round so that the square is "double-sided," so after joining with a slip stitch, I turn the work and do another slip stitch in the same spot to put the yarn back in the right spot.

This is what it looks like when I turn the work and do the extra slip stitch.

Row 2: (2 ch, 2 tr, 3 ch, 3 tr) into first 3 ch sp, * (1 ch, 3 tr, 3 ch, 3 tr) into next 3 ch sp, rep from * twice, join with a sl st.^

Row 3: (2 ch, 2 tr, 3 ch, 3 tr) into first 3 ch sp, * 1 ch 3 tr into 1 ch sp (1 ch, 3 tr, 3 ch, 3 tr) into each corer, rep from * ending 1 ch, sl st to join.^

Row 4: (2 ch, 2 tr, 3 ch, 3 tr) into first 3 ch sp, * 1 ch 3 tr into each 1 ch sp (1 ch, 3 tr, 3 ch, 3 tr) into each corner, rep *, ending 1 ch, sl st to join.^

Row 5: (2 ch, 2 tr, 3 ch, 3 tr) into first 3 ch sp, * 1 ch 3 tr into each 1 ch sp (1 ch, 3 tr, 3 ch, 3 tr) into each corner, rep *, ending 1 ch, sl st to join.^

Row 6: (2 ch, 2 tr, 3 ch, 3 tr) into first 3 ch sp, * 1 ch 3 tr into each 1 ch sp (1 ch, 3 tr, 3 ch, 3 tr) into each corner, rep *, ending 1 ch, sl st to join.^
NOTE: If not switching colours for the square, you do actually HAVE to turn the work between each round. (I didn't realize this until I forgot to do so one time.) This is brcause the pattern necessitates working into the spaces, and without turning you end up facing a solid area. For switching colours each round, the pattern alternates colours (frex 1 & 3 light, 2 & 4 dark) and the new colour is joined with a slip stitch to the first space.
Instructions for the border

Join the walnut by pulling a loop through. I did this just behind the finishing knot for the Claret, but you can join it anywhere.

After making the first join, chain one to lock everything into place. Put one double crochet into the next stitch, and continue on this way until you reach the corner.

Upon reaching the corner, put five double crochets into the corner space, then continue on as before, putting one double crochet into each stitch, treating all remaining corners as the first.

When you get back to the starting point, join with a slip stitch and fasten off.
I will make a similar post with the pattern for my "fancy" square sometime soon. I will be switching patterns anytime the colour switches, but you certainly don't have to if you decided to try this. You could use only one pattern, or you could set your own conditions for switching patterns. Whatever suits you best.
