Entry tags:
Crochet Squares II "fancy" pattern with pictures
Here is the pattern for my "fancy" square for my temperature blanket. The text is the same as what was in my main post about the blanket, but this one will have step by step pictures for anyone who likes it see the pattern as well as or instead of reading it.
The square was for Thursday June 3, it was 24 degrees Celsius with no rain, so the square is Forest and the border is Walnut Tweed, both "Impeccable Loops & Threads" yarn.
List of relevant abbreviations
***English terms, American terms will be in brackets
Wrh = wool round hook (I always say this as wrap round hook in my head)
Ch = chain
Sl st = slip stitch
Sc = single crochet (Amer. = slip stitch)
Dc = double crochet (Amer. = single crochet)
Tr = treble crochet (Amer. = double crochet)
Dble tr = double treble crochet (Amer. = treble crochet)
Sp = space
**I'm going to copy the patterns from the book as is, so all abbrevations will be referring to the English terms. For consistency's sake, any time I need to talk about a stitch or add instructions, I will also be using the English terms, even though I'm used to my grandma using the American ones. If anything is unclear, let me know, and I'll do my best to clarify.
*I will be making two different kinds of squares for this blanket. I will be switching patterns any time I have a colour change, though you could change patterns any way you choose, or simply stick with one of these for the whole blanket, if one appeals to you more than the other.
Patterns from Mon Tricot Knitting Dictionay 900 Stitches Patterns (I'm not certain of the year)
Crochet squares II
Pattern for the "fancy" square:
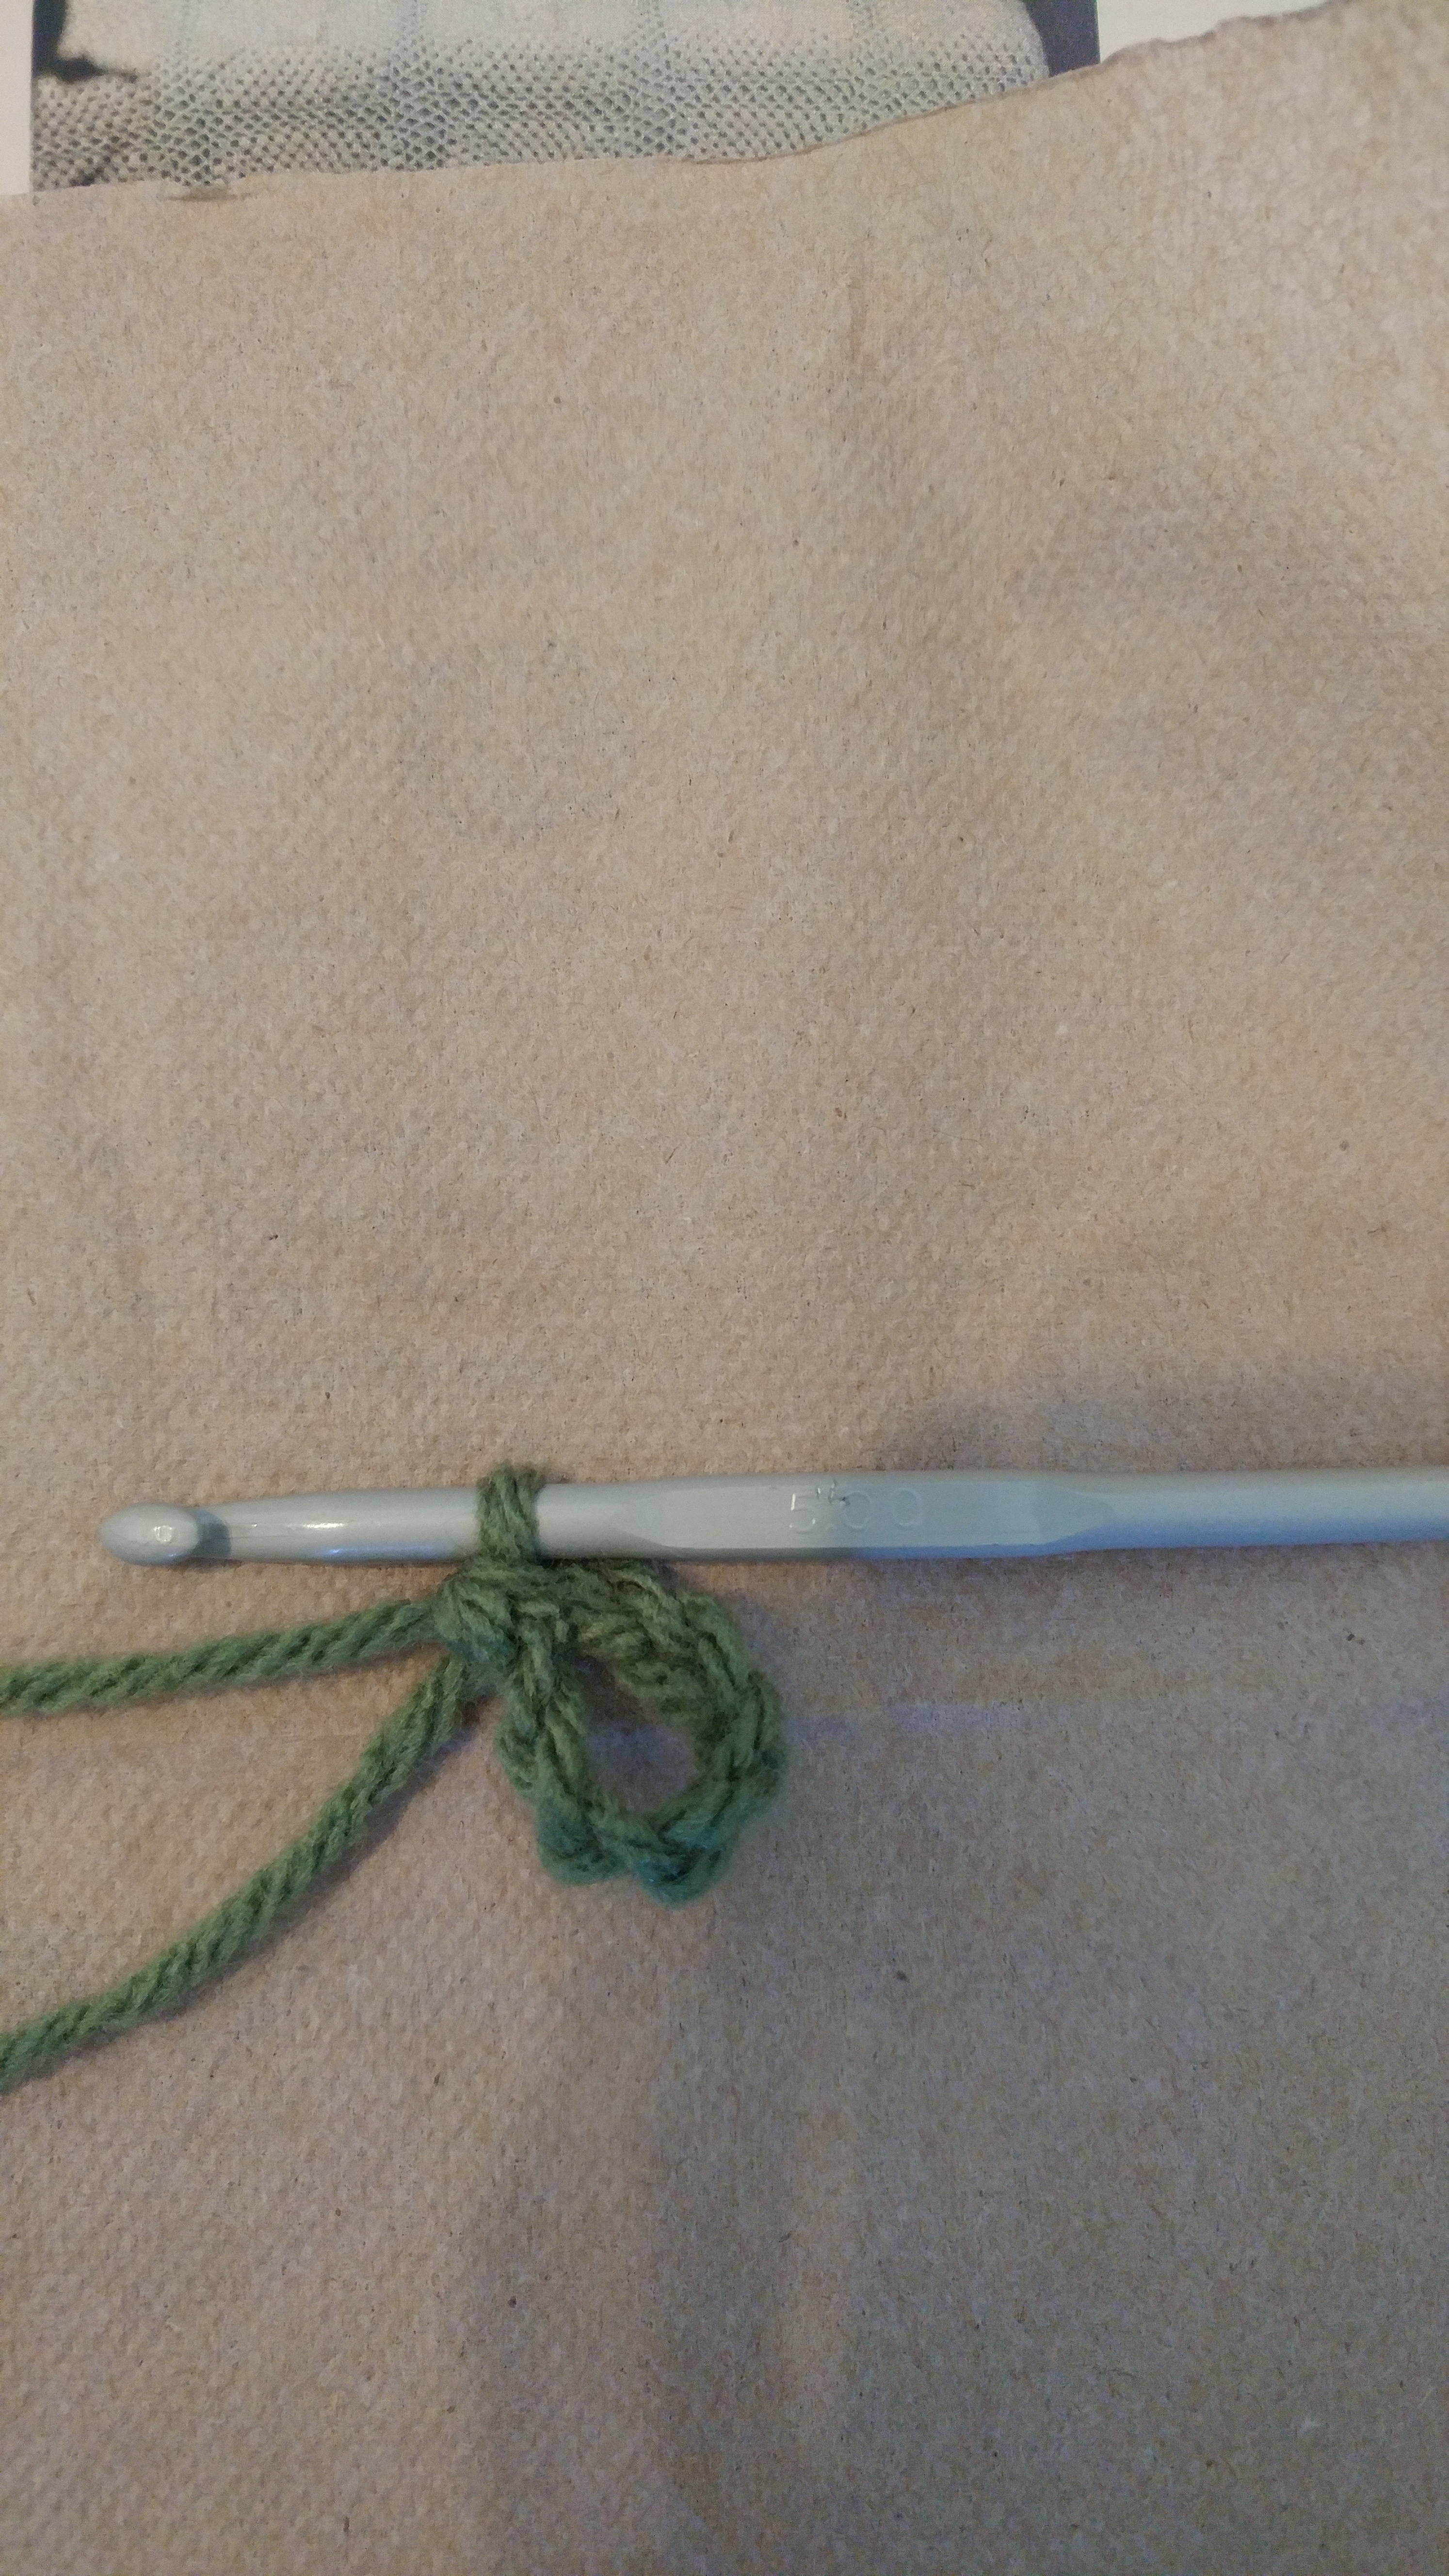
8 Ch, join in a ring with sl st.
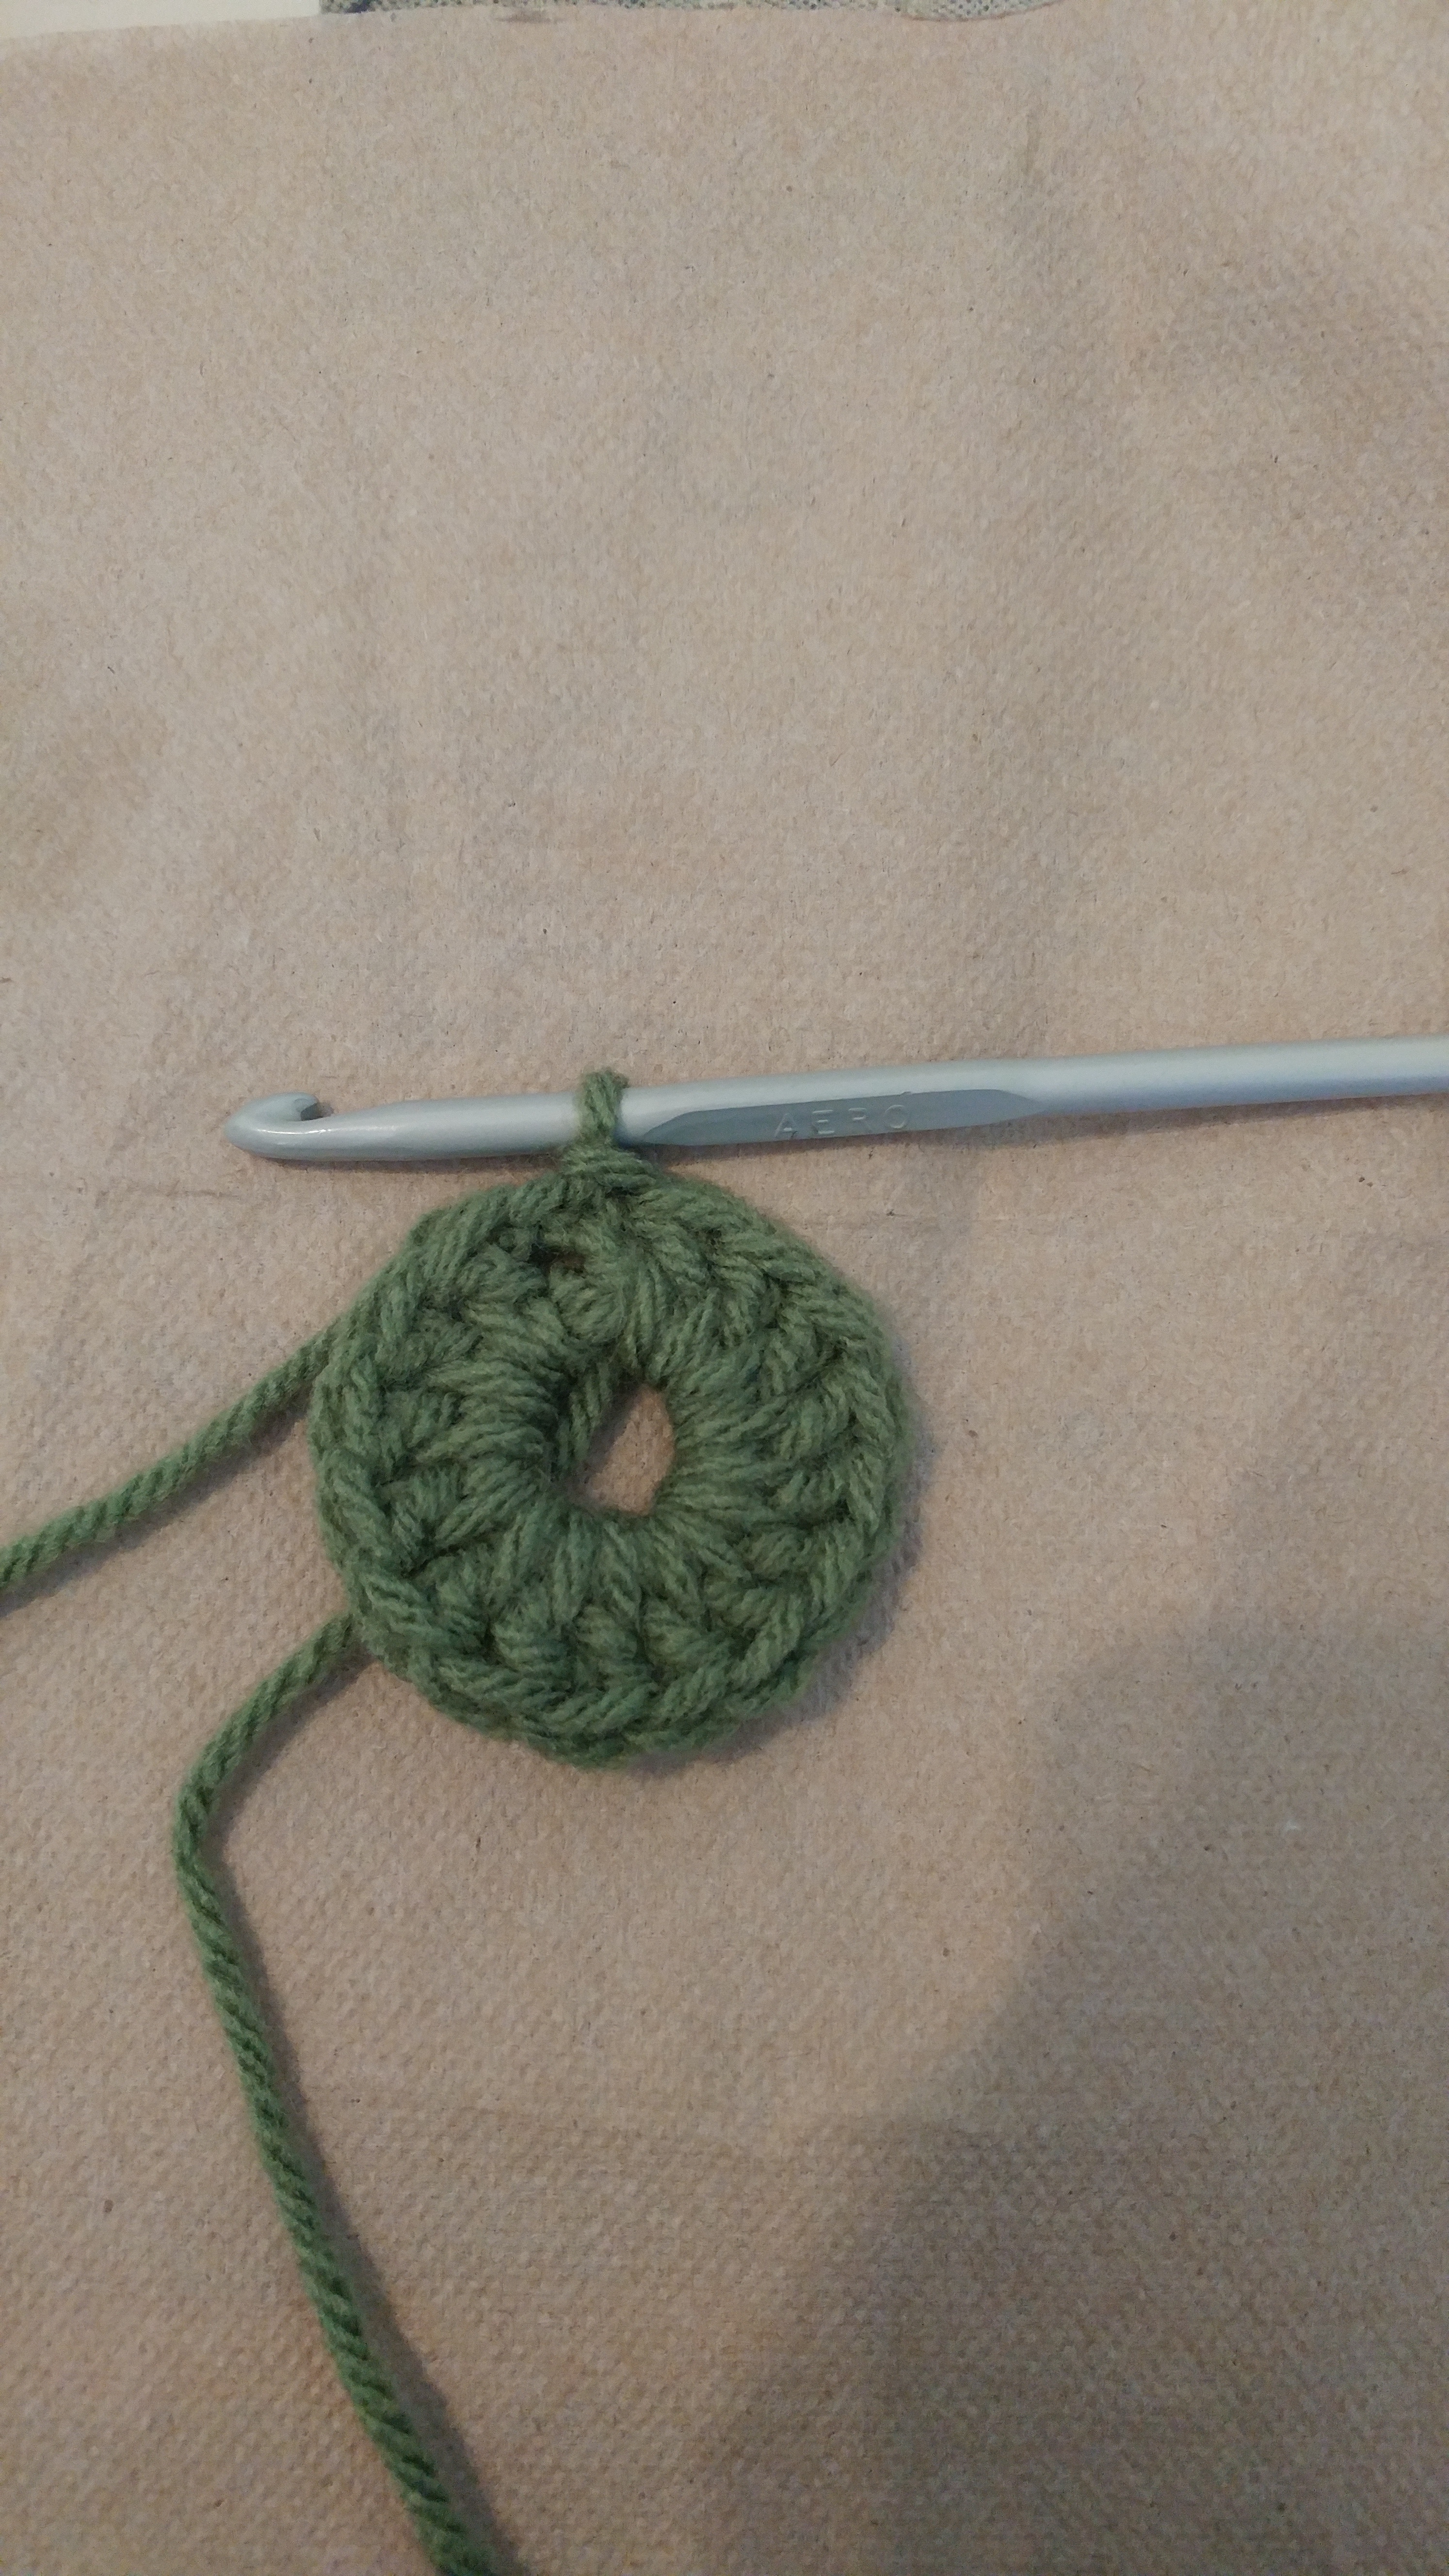
Row 1: 2 ch, work 15 trs into the ring, join with a sl st to 2nd of first 2 ch.

Row 2: 4 ch (1 tr, 2 ch) 15 times, join with a sl st to 2nd of 4 ch.

Row 3: 2 ch, 2 tr into first sp, 1 ch (3 tr, 1 ch) into each sp, sl st to join.
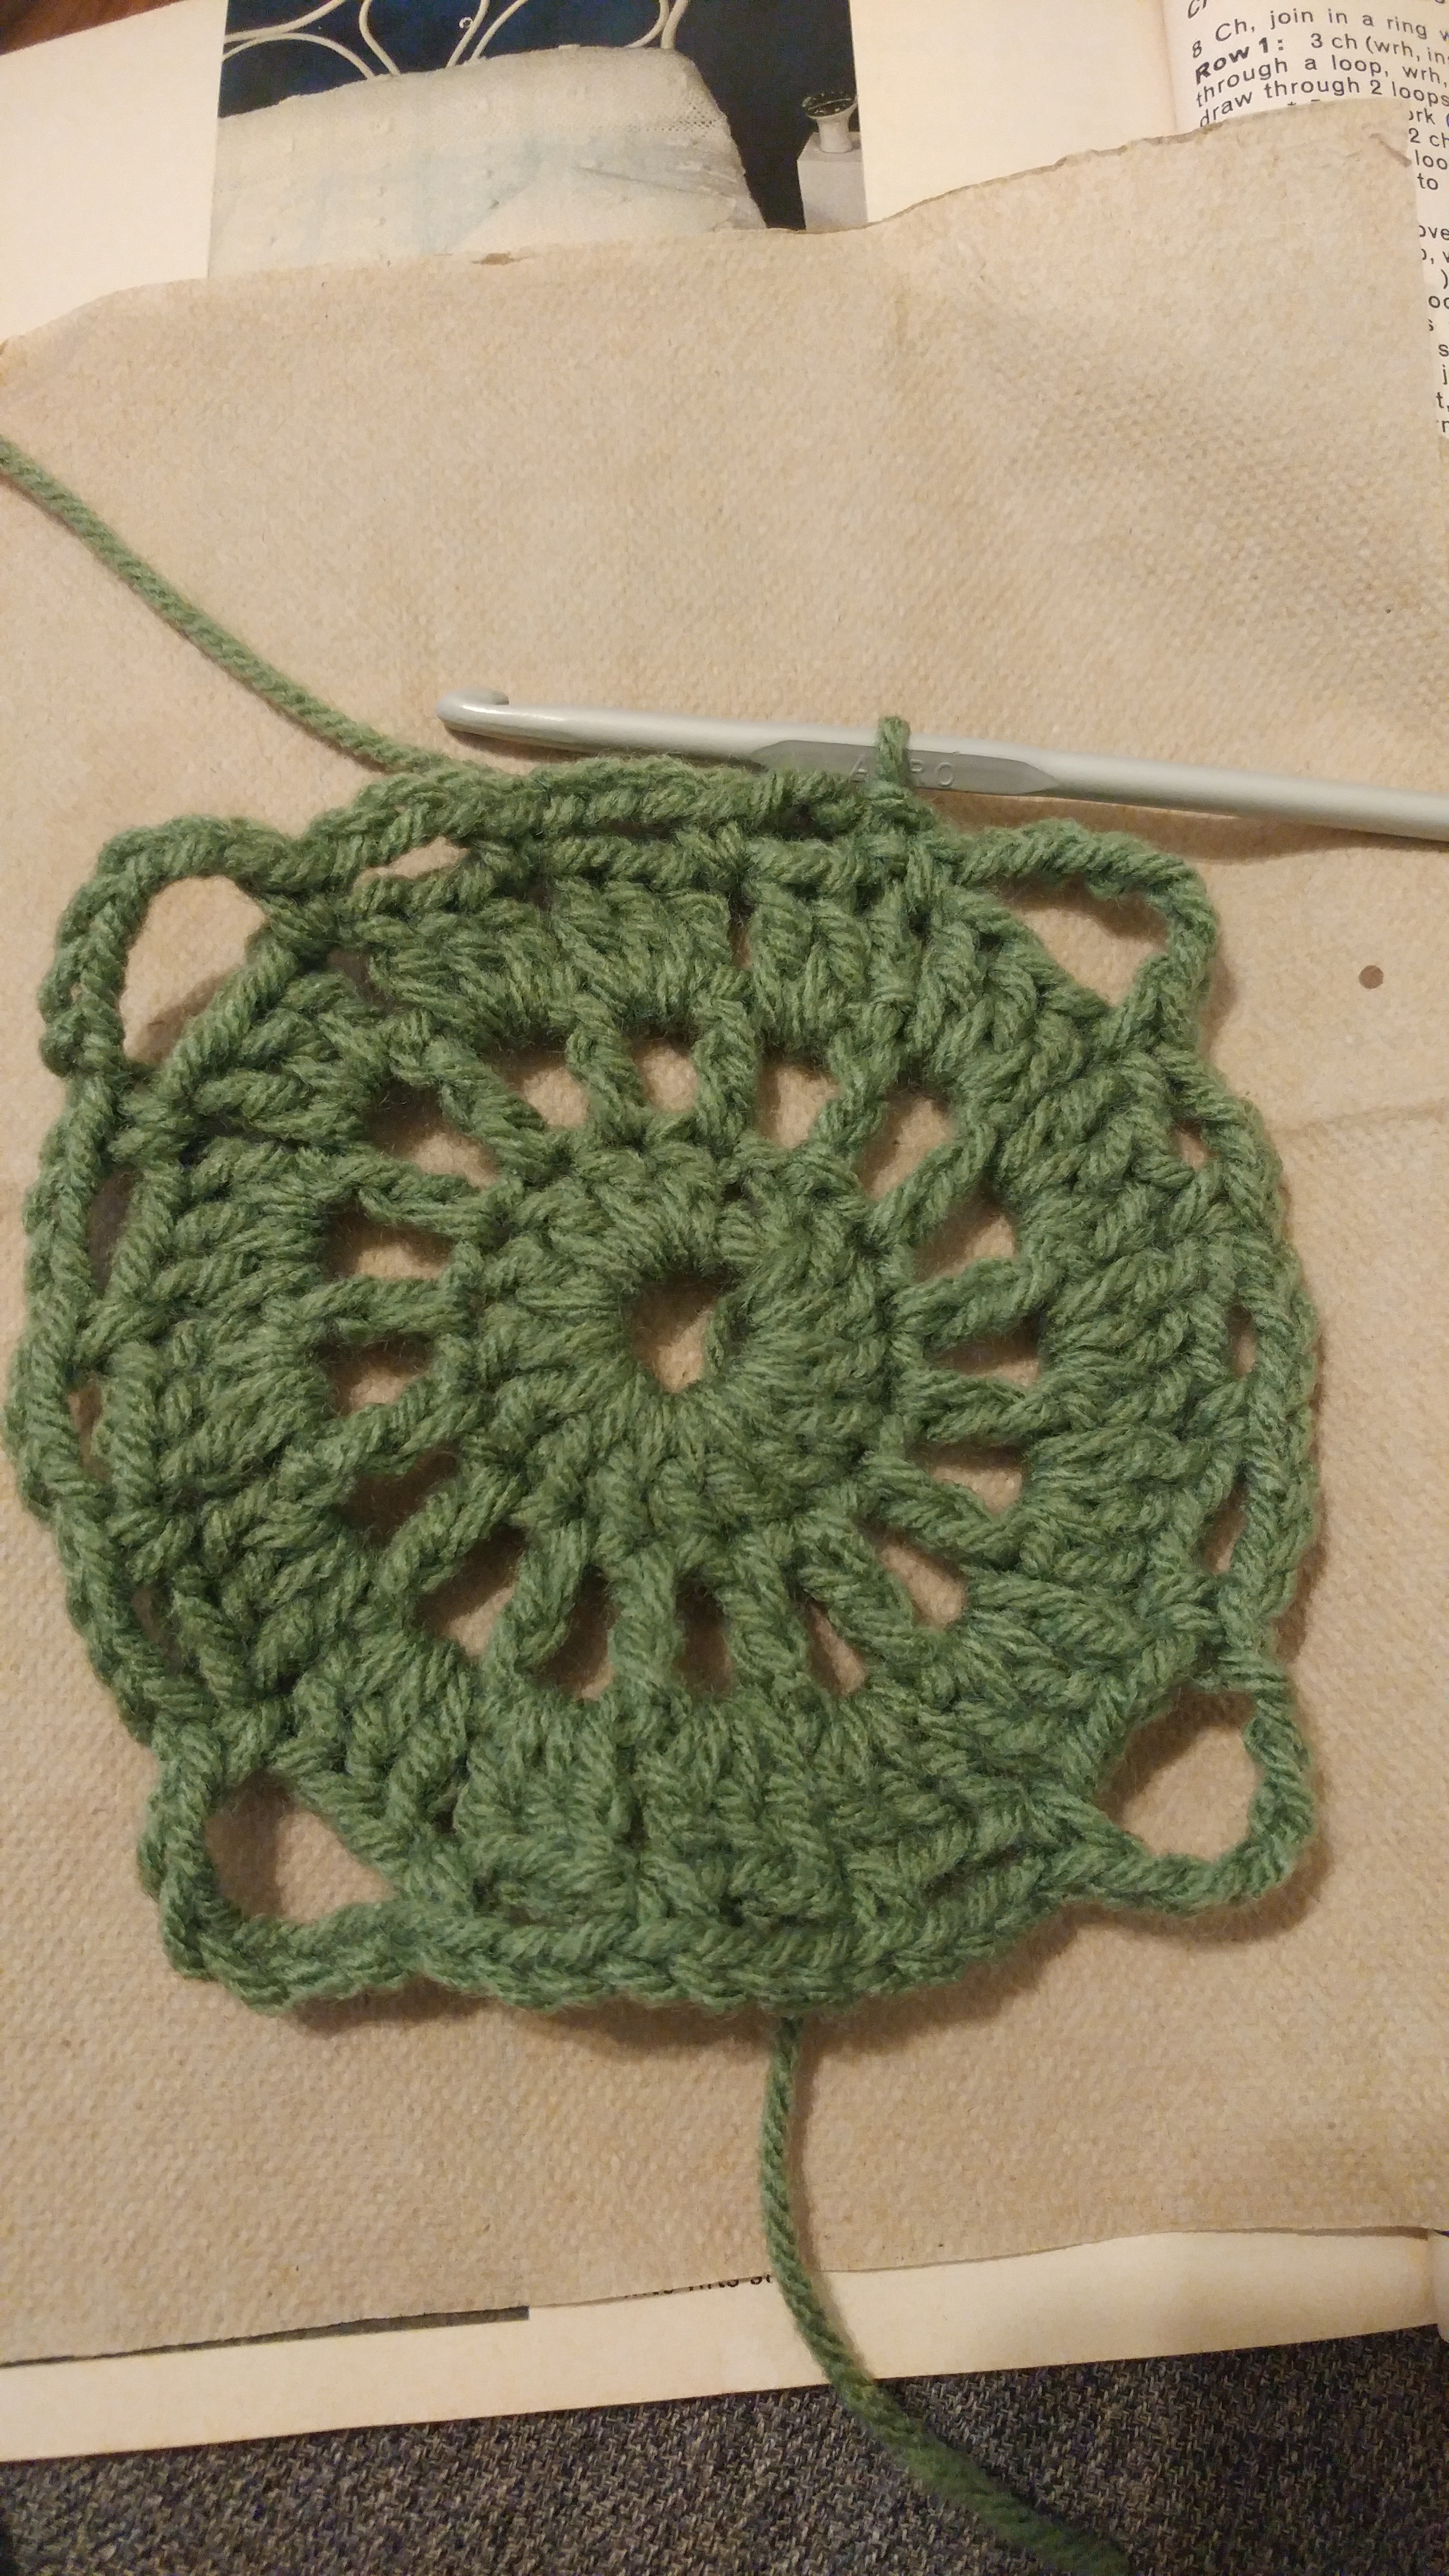
Row 4: *(3 ch, 1 dc into next 1 ch sp) 3 times, 6 ch, 1 dc into next sp *, to end, join with a sl st.

Row 5: 2 ch, 2 tr into first 3 ch sp, 3 tr into next two 3 ch sps, * (5 tr, 2ch, 5 tr) into corner sps, 3 tr into each 3 ch sp *, cont to end, sl st to join.
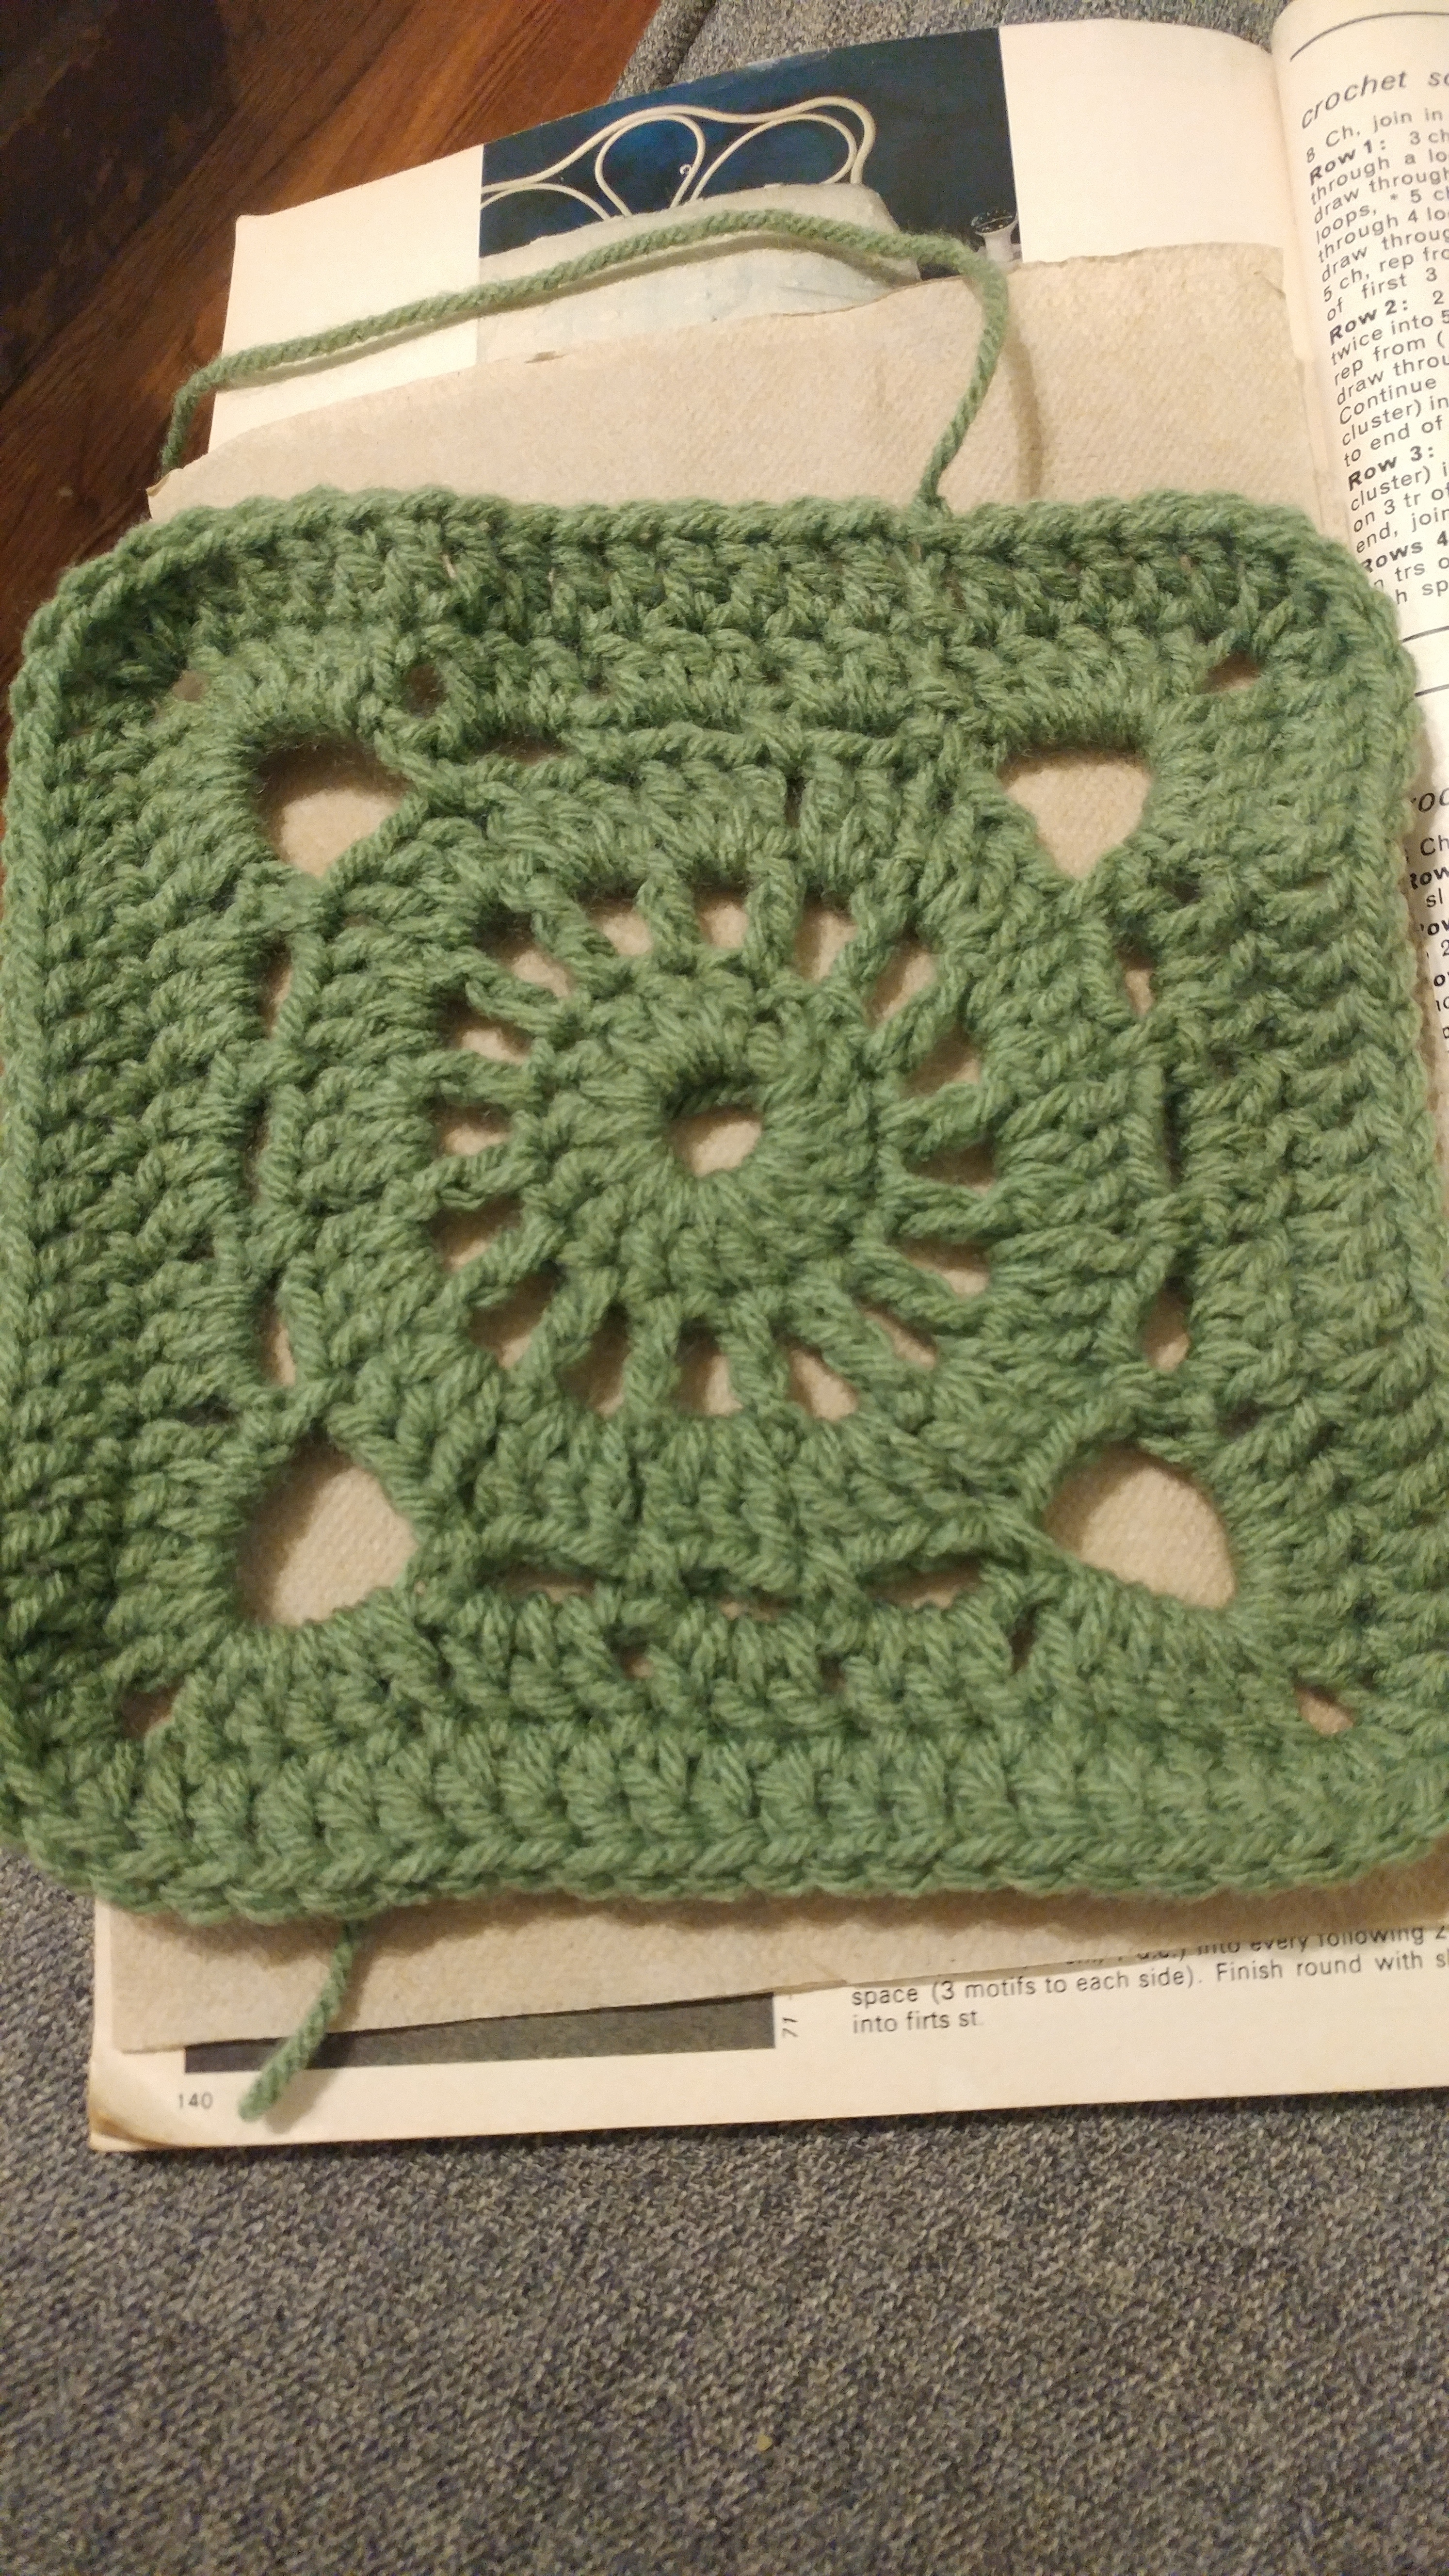
Row 6: 2 ch, work 1 tr into each st and 2 tr^ into each 2 ch sp at each corner.
Fasten off.
^I did 3 tr in each corner space, to square it off better.
For the border:
Join the walnut by pulling a loop through. I did this just behind the finishing knot for the Forest, but you can join it anywhere.
After making the first join, chain one to lock everything into place. Put one double crochet into the next stitch, and continue on this way until you reach the corner.
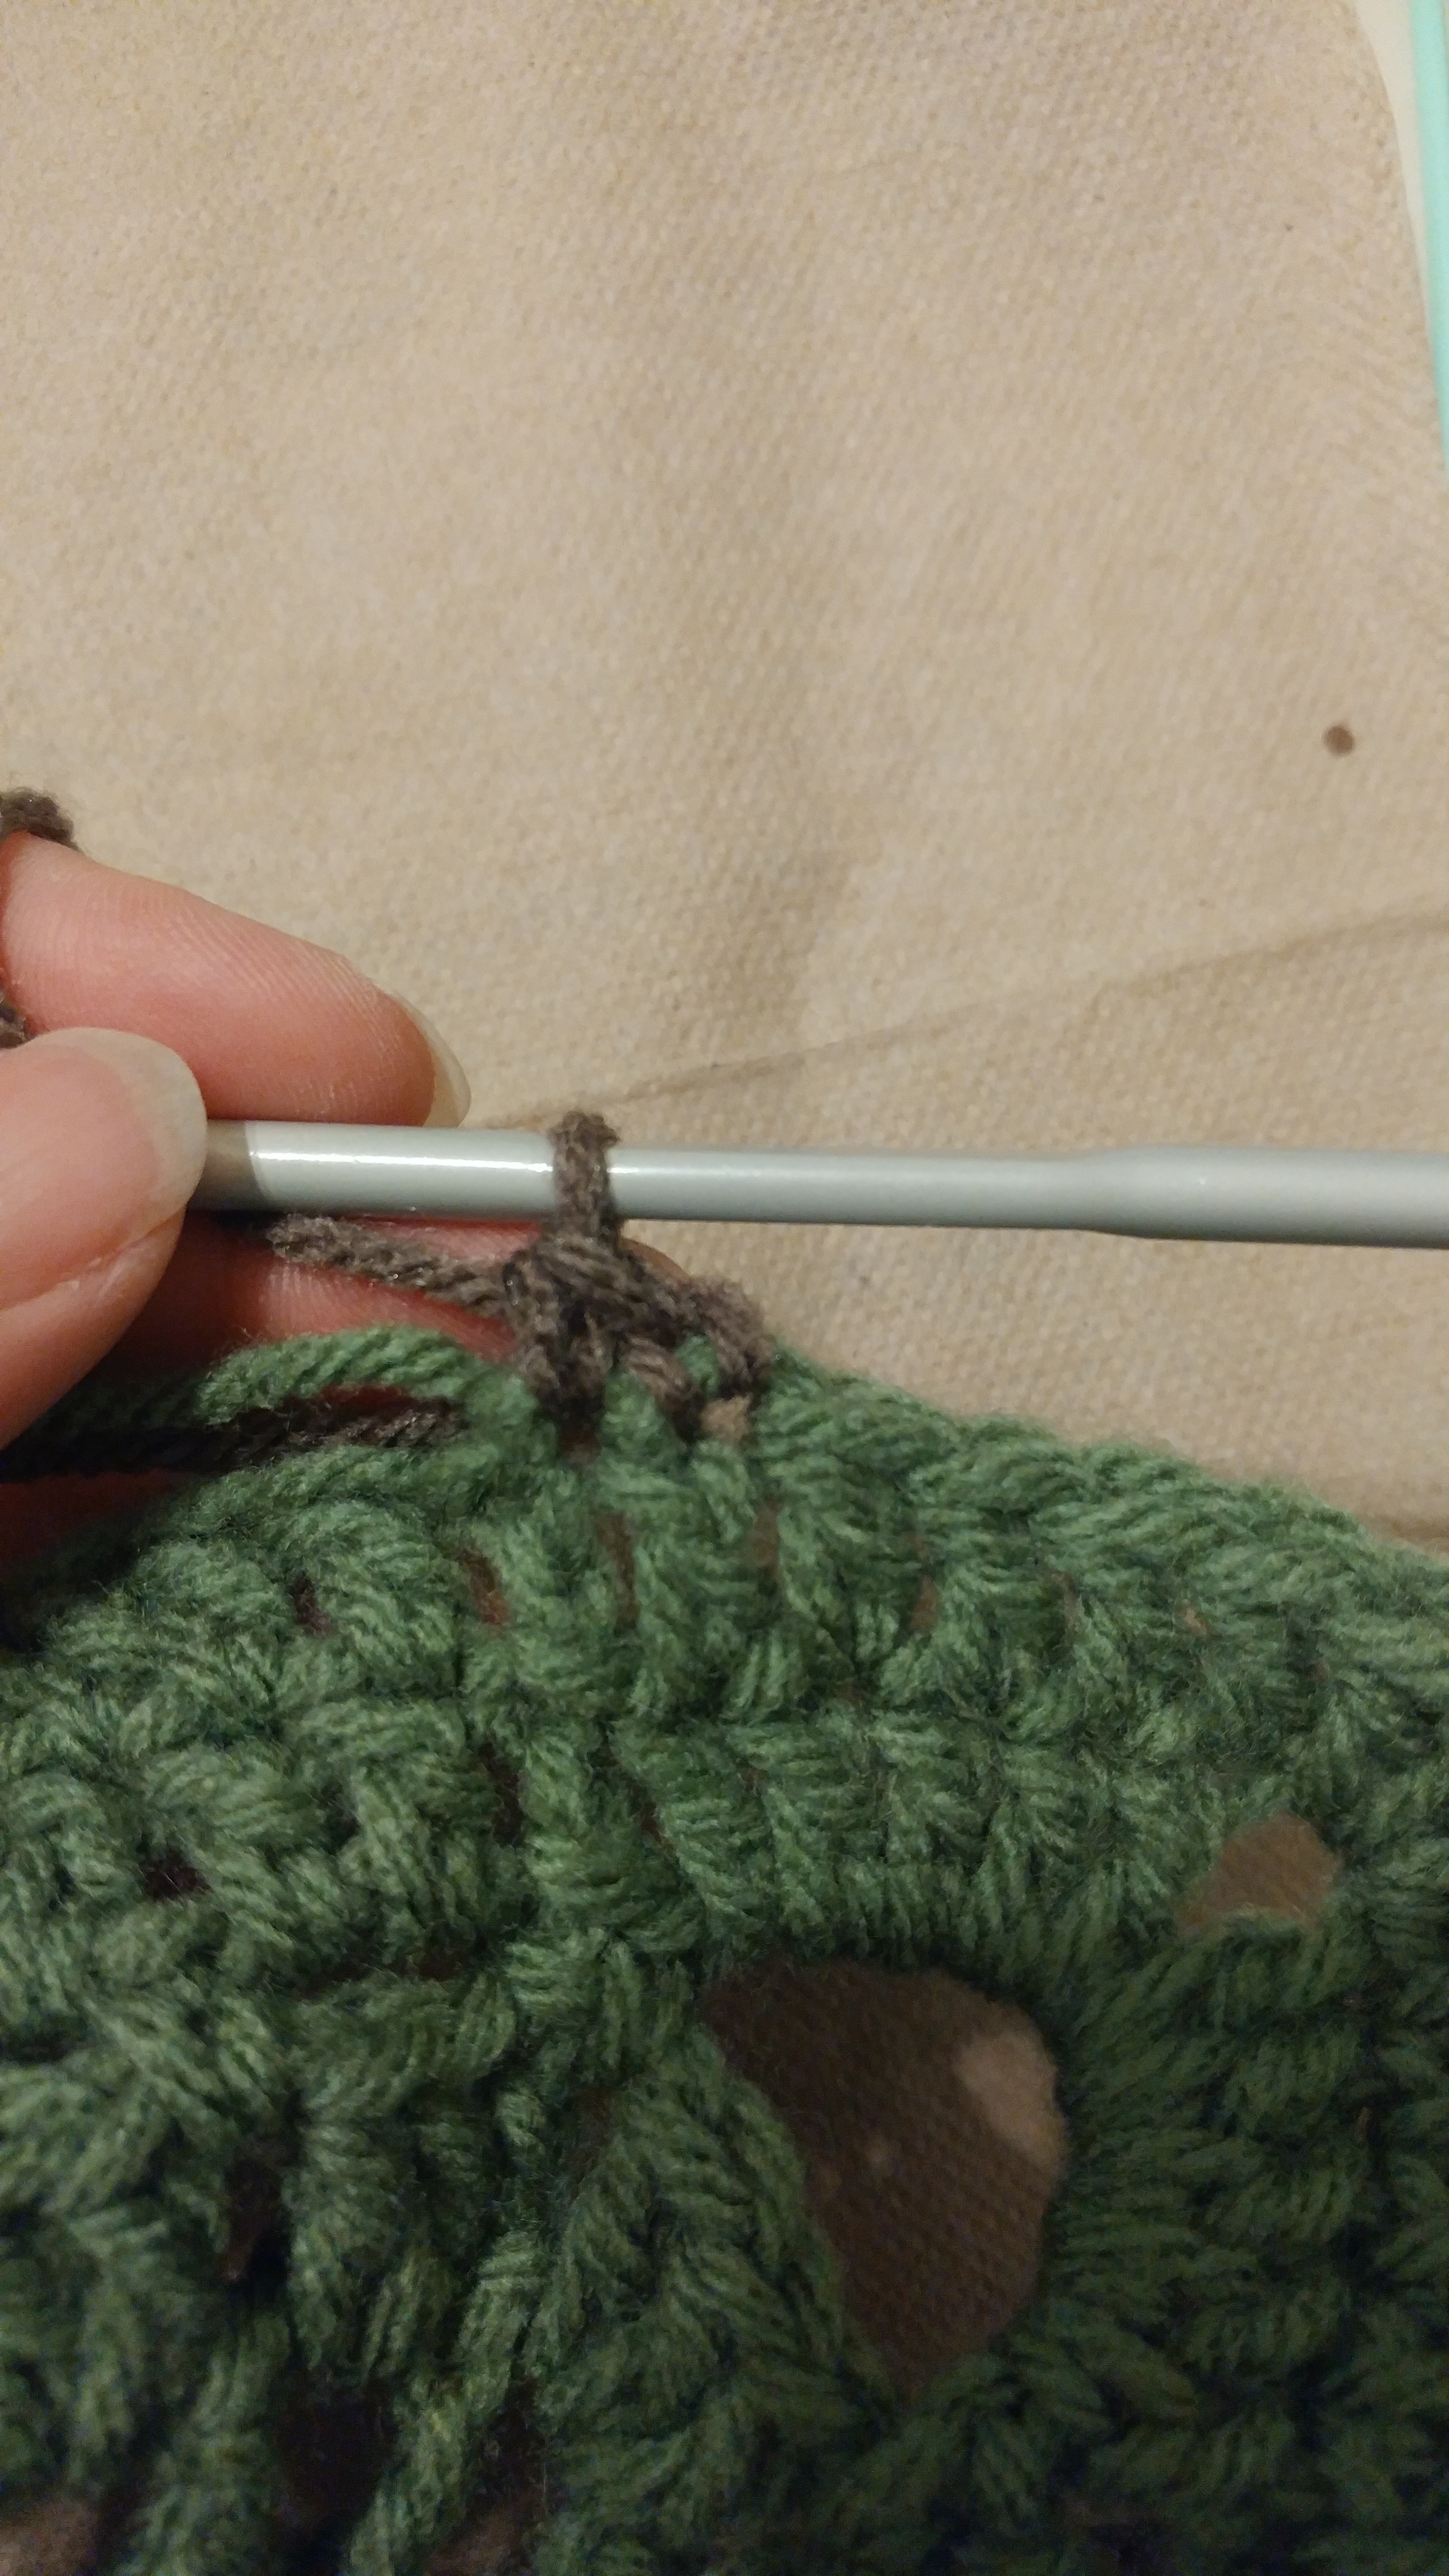
This is what it looks like when just beginning the border. For more detailed pictures on joining the border colour, visit the "plain" square post.
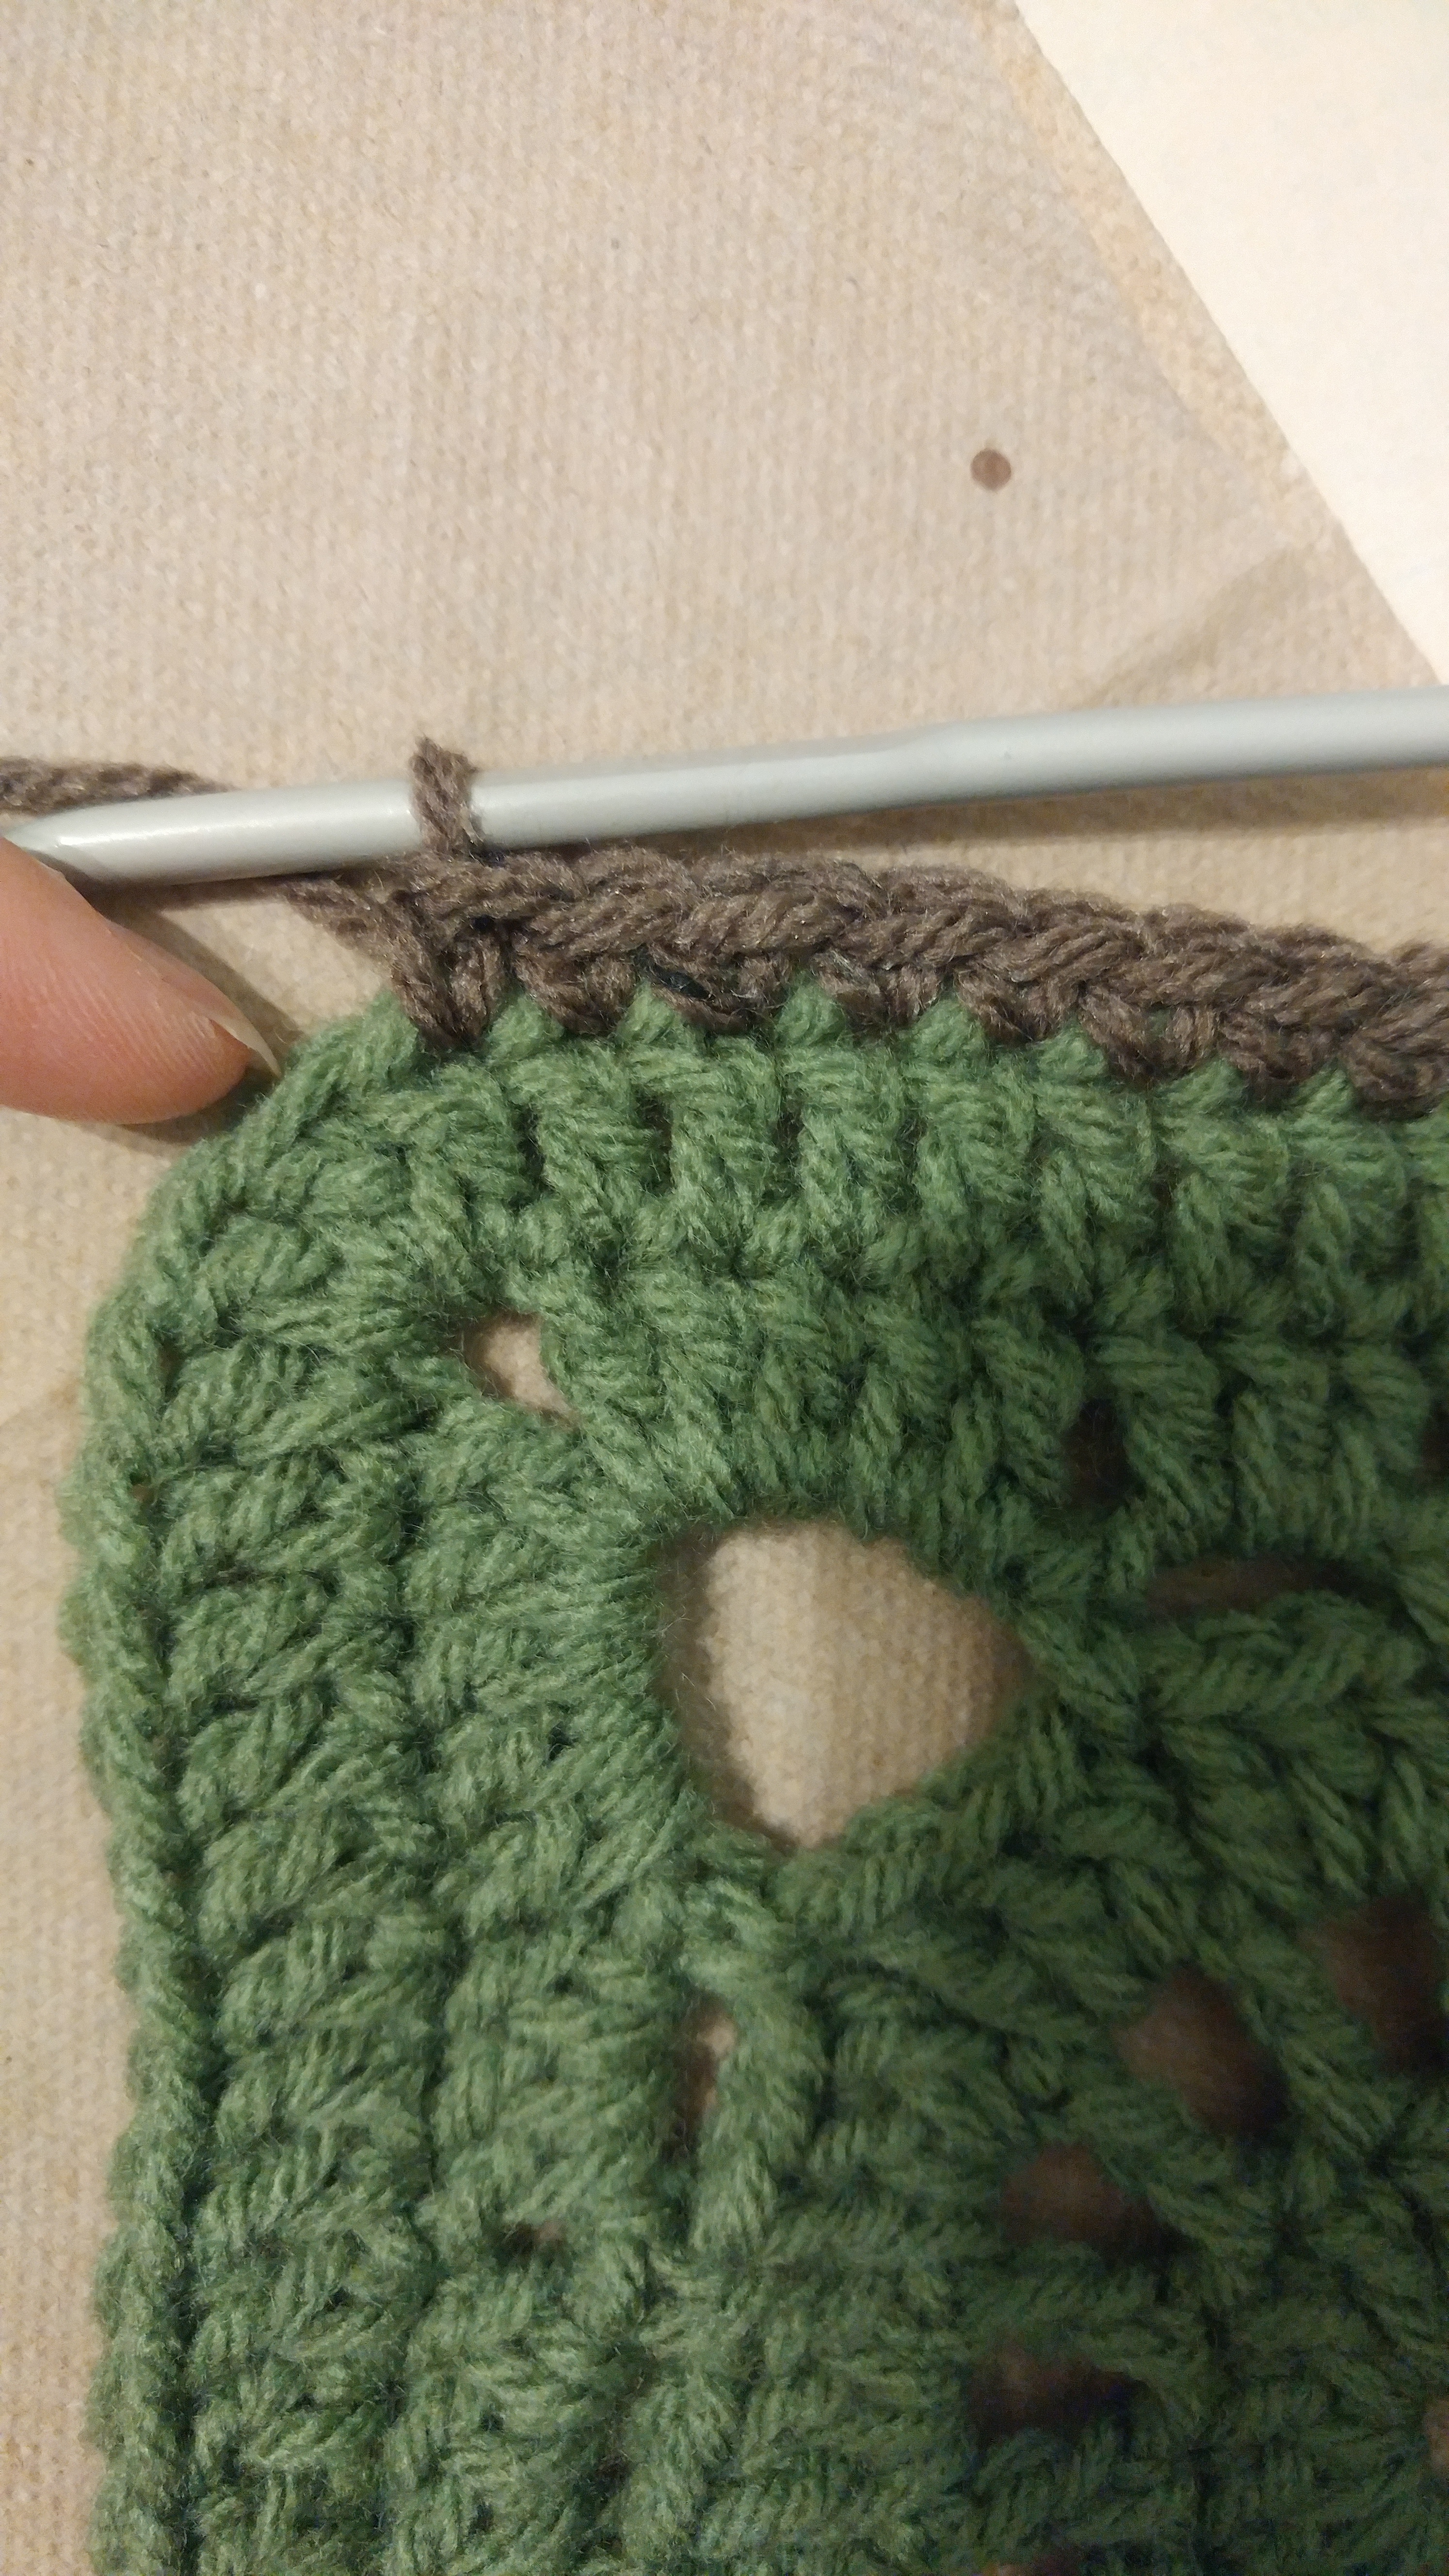
When you reach the corner, add two double crochets in the stitch that is in the top middle of the corner. My finger is pointing to the stitch I mean, so it's easier to tell what is going on. The important thing for me is to add the extra stitch in the same spot every time, so that your sqiare is symmetrical and every square is the same. I chose to add an extra stitch to help square off the corner a little better, and I find it works out, though I feel like I maybe should have done two stitches in the bottom middle of the corner as well.
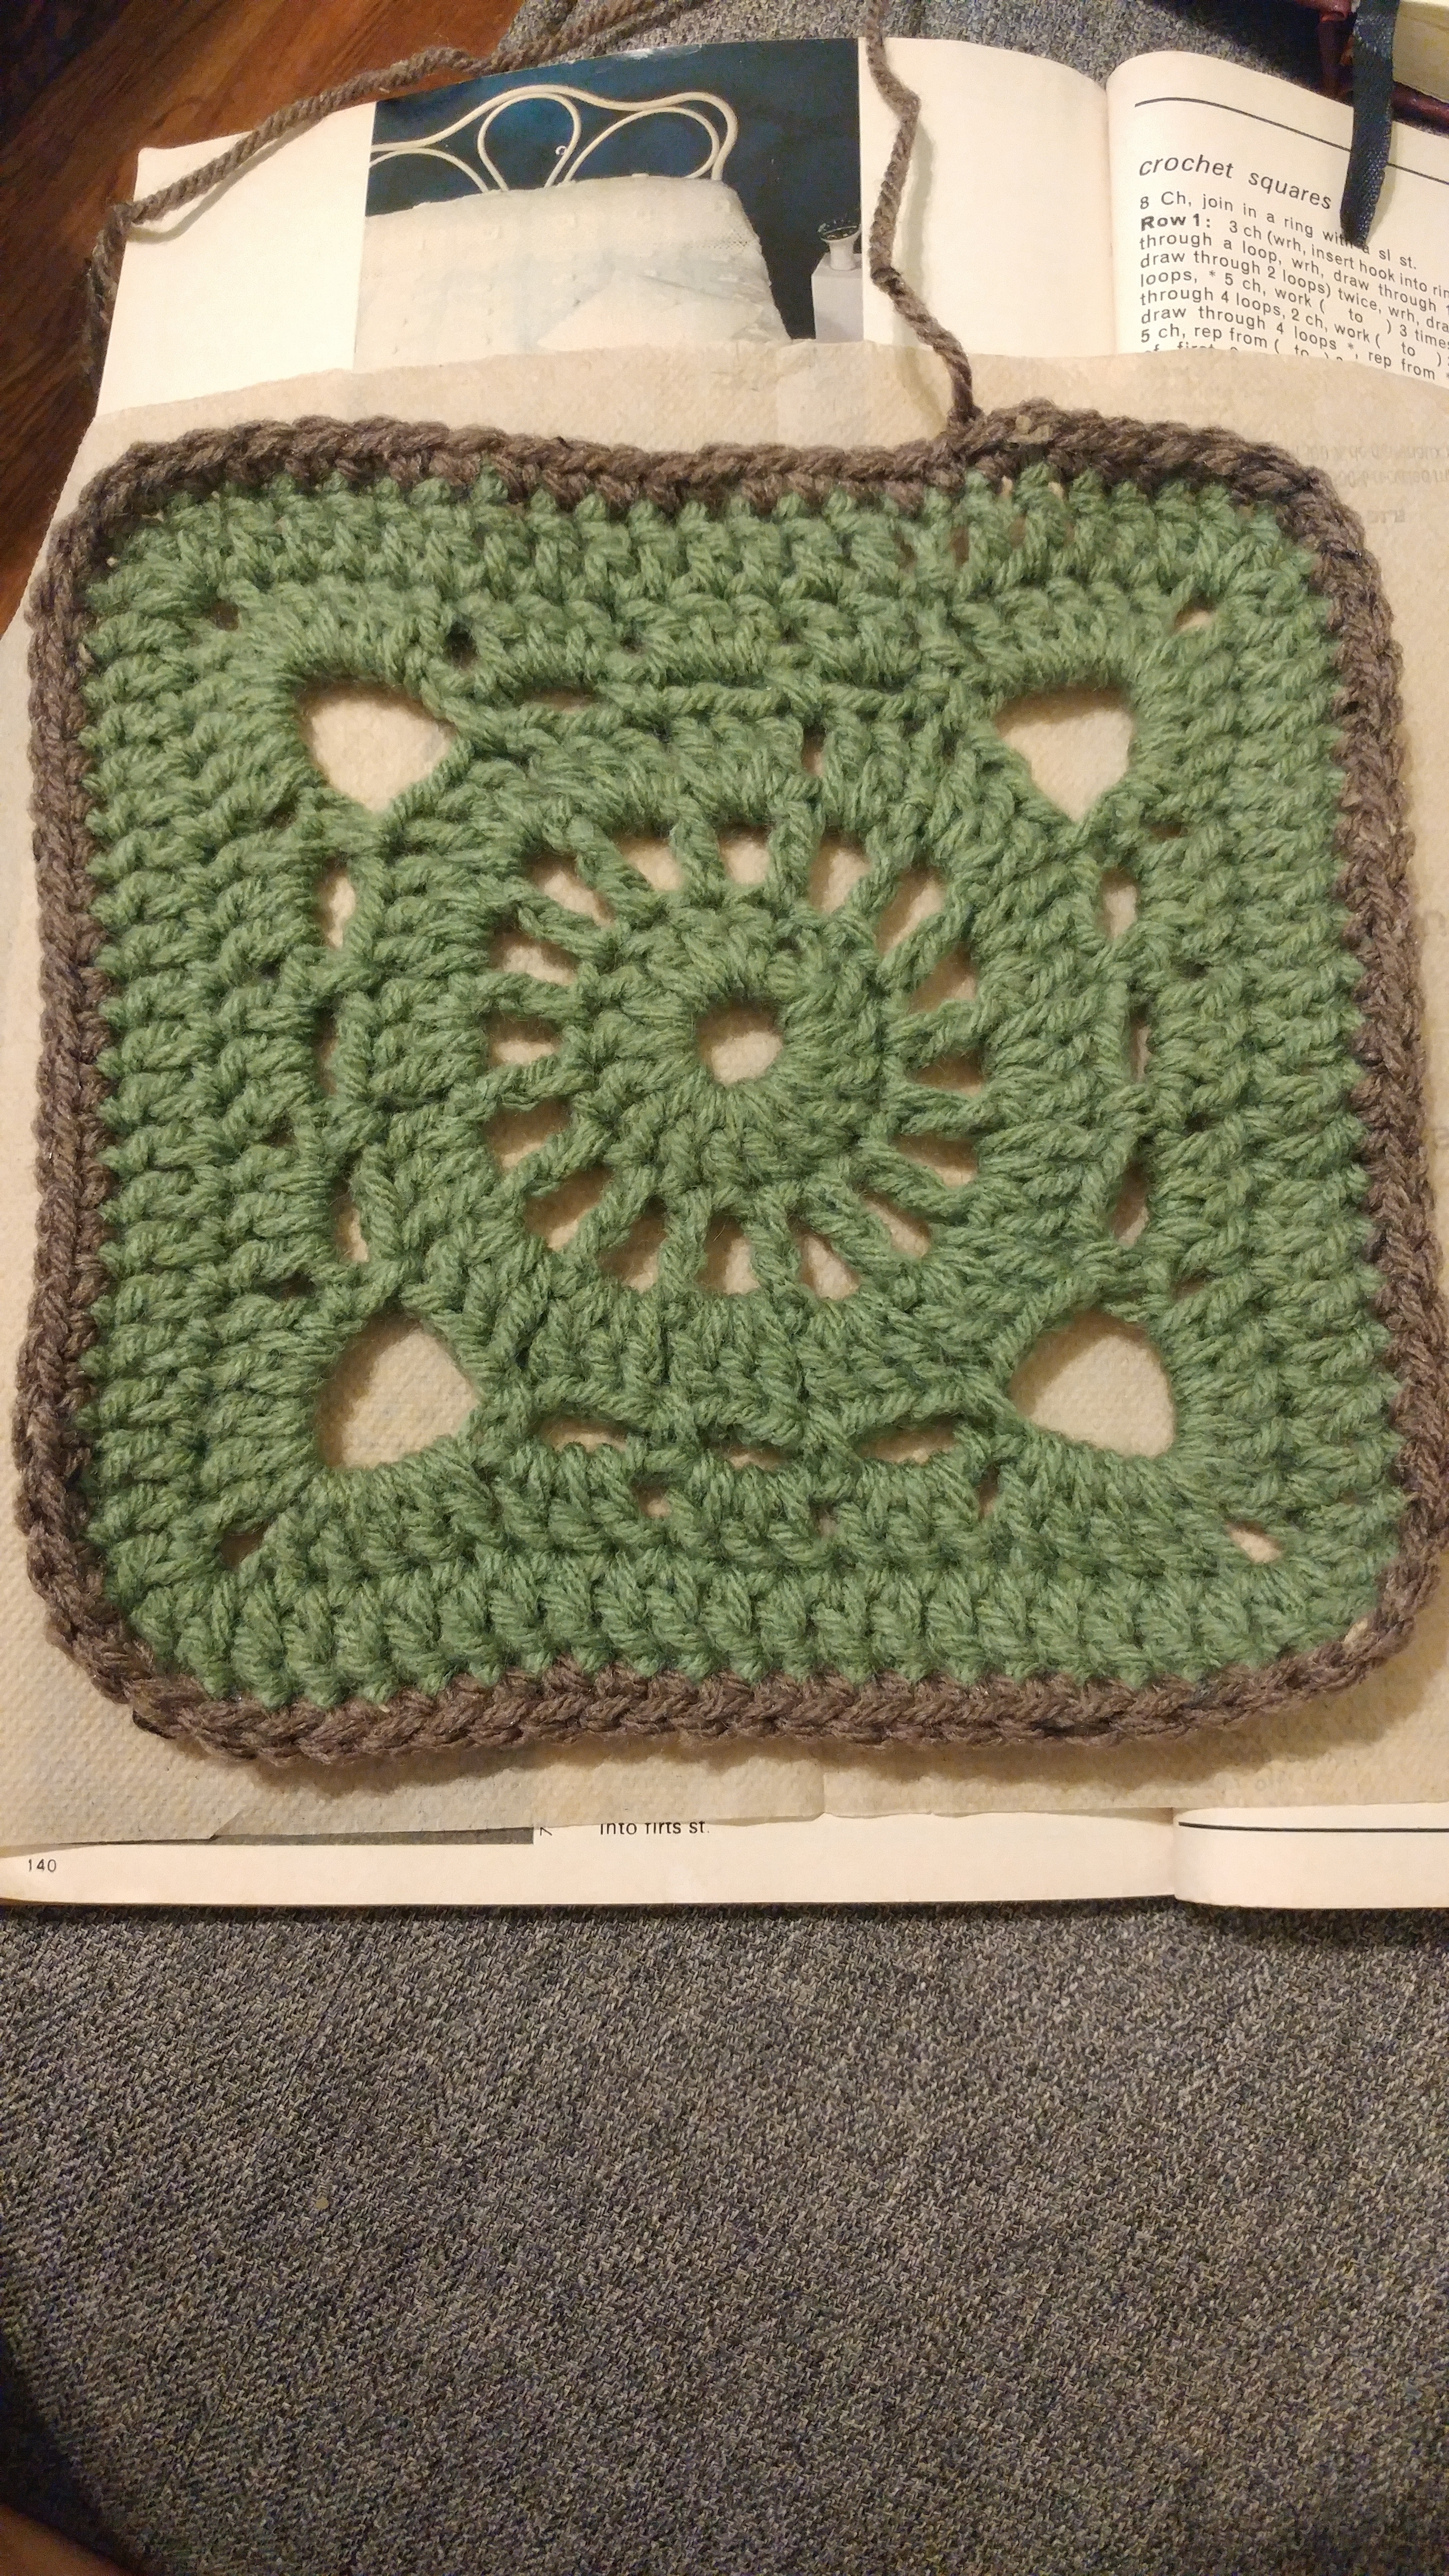
When you reach your starting point, join with a slip stitch and fasten off. I wove in the end because I don't have a plan yet for sewing all the squares together.
I hope the visual instructions for both squares are helpful, or at least interesting to look at. I will also post a picture, and possibly instructions, for sewing a row together omce I have one complete. My rows are going to be 9 squares across and today is the 9th, so I suspect I will have the row together by the end of the weekend, if everything goes according to plan.
The square was for Thursday June 3, it was 24 degrees Celsius with no rain, so the square is Forest and the border is Walnut Tweed, both "Impeccable Loops & Threads" yarn.
List of relevant abbreviations
***English terms, American terms will be in brackets
Wrh = wool round hook (I always say this as wrap round hook in my head)
Ch = chain
Sl st = slip stitch
Sc = single crochet (Amer. = slip stitch)
Dc = double crochet (Amer. = single crochet)
Tr = treble crochet (Amer. = double crochet)
Dble tr = double treble crochet (Amer. = treble crochet)
Sp = space
**I'm going to copy the patterns from the book as is, so all abbrevations will be referring to the English terms. For consistency's sake, any time I need to talk about a stitch or add instructions, I will also be using the English terms, even though I'm used to my grandma using the American ones. If anything is unclear, let me know, and I'll do my best to clarify.
*I will be making two different kinds of squares for this blanket. I will be switching patterns any time I have a colour change, though you could change patterns any way you choose, or simply stick with one of these for the whole blanket, if one appeals to you more than the other.
Patterns from Mon Tricot Knitting Dictionay 900 Stitches Patterns (I'm not certain of the year)
Crochet squares II
Pattern for the "fancy" square:

8 Ch, join in a ring with sl st.

Row 1: 2 ch, work 15 trs into the ring, join with a sl st to 2nd of first 2 ch.

Row 2: 4 ch (1 tr, 2 ch) 15 times, join with a sl st to 2nd of 4 ch.

Row 3: 2 ch, 2 tr into first sp, 1 ch (3 tr, 1 ch) into each sp, sl st to join.

Row 4: *(3 ch, 1 dc into next 1 ch sp) 3 times, 6 ch, 1 dc into next sp *, to end, join with a sl st.

Row 5: 2 ch, 2 tr into first 3 ch sp, 3 tr into next two 3 ch sps, * (5 tr, 2ch, 5 tr) into corner sps, 3 tr into each 3 ch sp *, cont to end, sl st to join.

Row 6: 2 ch, work 1 tr into each st and 2 tr^ into each 2 ch sp at each corner.
Fasten off.
^I did 3 tr in each corner space, to square it off better.
For the border:
Join the walnut by pulling a loop through. I did this just behind the finishing knot for the Forest, but you can join it anywhere.
After making the first join, chain one to lock everything into place. Put one double crochet into the next stitch, and continue on this way until you reach the corner.

This is what it looks like when just beginning the border. For more detailed pictures on joining the border colour, visit the "plain" square post.

When you reach the corner, add two double crochets in the stitch that is in the top middle of the corner. My finger is pointing to the stitch I mean, so it's easier to tell what is going on. The important thing for me is to add the extra stitch in the same spot every time, so that your sqiare is symmetrical and every square is the same. I chose to add an extra stitch to help square off the corner a little better, and I find it works out, though I feel like I maybe should have done two stitches in the bottom middle of the corner as well.

When you reach your starting point, join with a slip stitch and fasten off. I wove in the end because I don't have a plan yet for sewing all the squares together.
I hope the visual instructions for both squares are helpful, or at least interesting to look at. I will also post a picture, and possibly instructions, for sewing a row together omce I have one complete. My rows are going to be 9 squares across and today is the 9th, so I suspect I will have the row together by the end of the weekend, if everything goes according to plan.
